Welcome!
 Hi, I'm Tori! Welcome to Healthy Plate Happy Family!
I am a fun-loving, healthy-eating, wife, mom, holistic
nutrition student, aspiring yogi, SUP-enthusiast, living
and loving life on the beautiful coast of West Michigan.
Here you'll find all of the whole foods, clean-eating recipes
that I am cooking up to keep my family happy and healthy!
Thanks for stopping by!
Hi, I'm Tori! Welcome to Healthy Plate Happy Family!
I am a fun-loving, healthy-eating, wife, mom, holistic
nutrition student, aspiring yogi, SUP-enthusiast, living
and loving life on the beautiful coast of West Michigan.
Here you'll find all of the whole foods, clean-eating recipes
that I am cooking up to keep my family happy and healthy!
Thanks for stopping by!


Happy Wednesday!!!
For any new visitors to Healthy Plate Happy Family, this is the one day during the week where I show you a picture of everything that I ate during the day in hopes of showing you how to put “healthy eating” all together.
I have procrastinated putting this post together because of my colossal dinner FAIL. But I guess you will see that I am living real-life here, with chaos and changes in plans and crabby little ones, and sometimes you just have to roll with it!
First up, for breakfast, I took advantage of a nearly empty Almond Butter jar and made a pumpkin version of Overnight Oats in a Jar. Now, Overnight Oats can be made in any container you’d like. I just happen to like taking advantage of the little bit of almond butter that is left to blend in with the other ingredients.
Overnight Oats are a super convenient grab-and-go breakfast. The night before, you simply blend up 1 part oats to 2 parts liquid (usually milk or water) and leave them to combine and thicken up overnight. The flavor combinations and toppings are endless here!
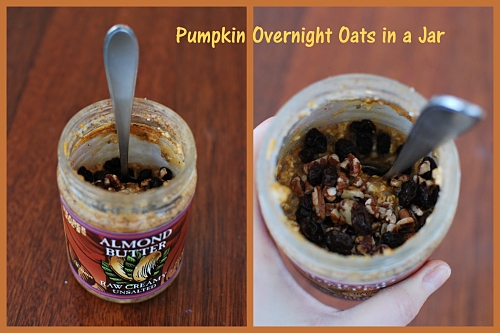
Today, I went with pumpkin because I had a can of it open. Into the jar (last night) I mixed together:
- 1/3 cup old fashioned oats
- 1/3 cup water ( because we were out of almond milk which is what I would normally use)
- 1 T chia seeds (ground flax seed would work too)
- 1/3 cup pumpkin puree
- 1 T. maple syrup
- 1/2 tsp. pumpkin pie spice (just cinnamon would be fine too)
Store this in the refrigerator overnight. This morning, I topped it with some raisins and chopped pecans. YUM!
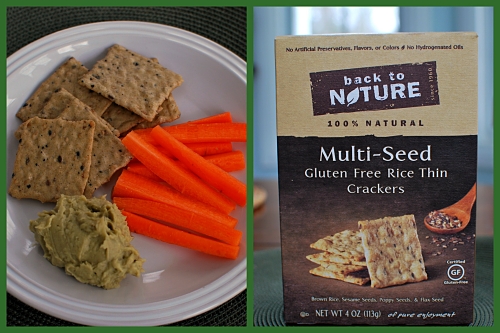
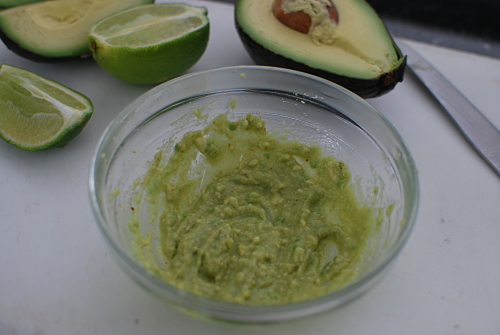
I had a snack mid-morning of carrots, gluten-free rice crackers, and this Avocado and White Bean Dip. It is really tasty – like a combination of hummus and guacamole. And it is usually a little more green, but I made this a couple of days ago. Perhaps the blinding brightness of the carrots will make up for it!
After a marathon grocery shopping trip, I came home and made lunch. Today it was a massaged kale salad, one of my favorite salads. This salad took me some time to warm up to. In the beginning, I would make a smaller portion and could eat it as long as it was paired up with a sandwich or soup. Now, I’ve grown to really like it and it can be my whole lunch. I love this because of the powerhouse of nutrition – Vitamins A, K, C, calcium, fiber and loads of antioxidants in the kale, plus a little healthy fats from the avocado and olive oil to help absorb the nutrients. And I haven’t even gotten to the add-ins!
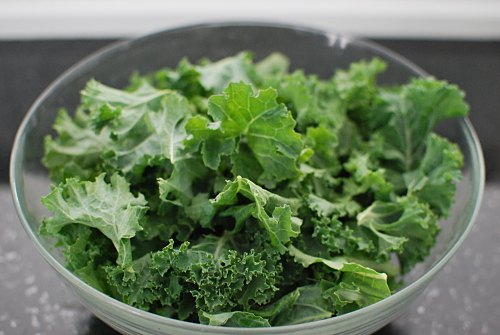
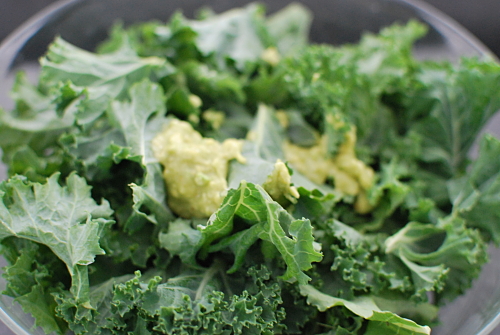
Start with a huge bowl of washed kale (stems removed, leaves torn into bite-size pieces).
Make the dressing with a small wedge of avocado (a little less than 1/4 of an avocado), juice from a wedge of lime, 1 tsp. olive oil, a pinch of kosher salt, and a sprinkle of cayenne pepper. Did you get all of those precise measurements?!?!?!?
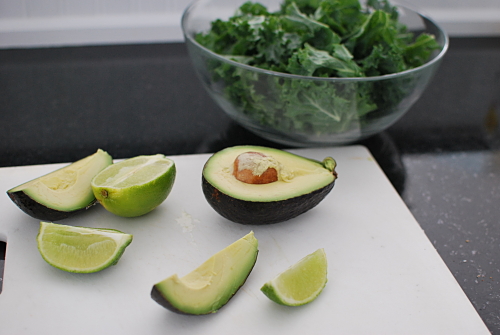
Mash them up until it sort of looks like guacamole.
Dump the avocado mixture into the bowl of kale, and with CLEAN hands, massage the dressing right into the kale leaves. This will tenderize the leaves making them much easier to eat and more palatable.
Then your huge bowl of kale will be reduced to a more reasonable looking portion like this.
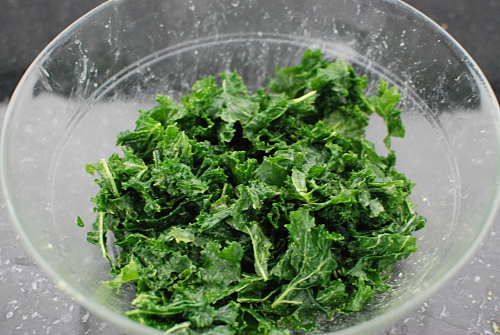
Taste and adjust seasonings. I usually like to add an extra squeeze of lime to give it more of a tangy flavor. At this point, you can cover the salad and let it sit for a little while. But I don’t recommend refrigerating it for a long period of time, or it will get pretty soggy, at least for my tastes.
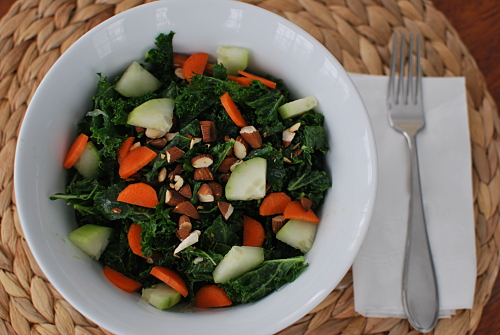
Top with lightly toasted nuts (today was almonds), carrots, and cucumbers. A lot of times, I’ll add diced apples or dried cranberries in as well for a little sweet contrast.
So I realized this afternoon that Darren and Hailey were going to be gone for the rescheduled Daddy Daughter Dance, so I would be having a little dinner date at home with Jake. But then he wasn’t feeling well and just wanted to play Monopoly and snuggle on the couch. Next thing I know, he was hungry for food RIGHT NOW, and I was scrambling to pull some dinner together. I could tell he wasn’t feeling well because he didn’t really want any of his usual favorites. He wanted grapefruit, then a homemade popsicle (pureed watermelon and strawberry), and then asked for a treat or a smoothie. At this point, I was starving too and I also felt like Jake needed a little more substance. So I decided to scrap my plans for a Greek salad and falafel, and make the treat/smoothie/dinner all into one dish!!!
Behold, the Chocolate Covered Cherry Smoothie!
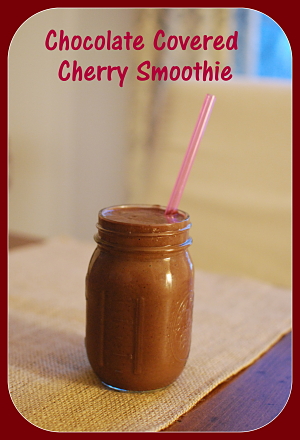
Believe it or not, this thing was so filling that it turned out to be my dinner! Maybe dinner wasn’t a fail afterall?????
Chocolate Covered Cherry Smoothie
- a little less than half of an avocado (1/4 to 1/2 of an avocado would work)
- 1 1/2 cups unsweetened almond milk
- 2 T raw cacao powder (or cocoa powder would work)
- 1 huge handful of spinach
- 1 whole banana, frozen in chunks
- 1 1/2 cups frozen sweet cherries (this is also awesome with strawberries!!)
Mix all ingredients in a blender until super smooth and creamy. Add more almond milk to thin or ice cubes to thicken, as necessary. This made 2 decent size portions. You could scale back to 1 cup of cherries/strawberries, 1 T. cacoa, and 1 cup of almond milk for an individual portion.
So there you have it for this Wednesday!
Some people are all about the awesome deals at outlet stores. Some are really into picking up a treasure at a thrift store or garage sale. But me? I love scoring a deal at the grocery store!
I especially love the clearance produce section! Its a great place to pick up perfectly good produce for a fraction of the price (since you rarely see coupons for healthy whole foods or fresh fruits and vegetables). Some of the staples I can usually find at our store are onions, citrus fruits, and mini peppers. We have potatoes and apples a lot as well, but I prefer to buy organic versions of those.
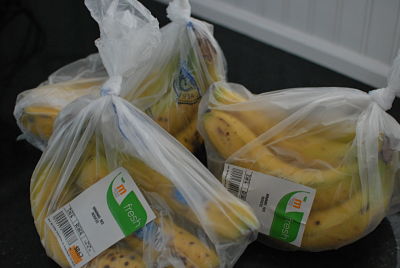
One of my favorite things to find??? Bananas!!!! These are one of the few fruits that I am perfectly OK with eating non-organic since you don’t eat the outer part of the fruit. And even if they’re a little past their prime, they are perfect for cooking or slicing and freezing for smoothies and other frozen treats.
So this week when I found bags of clearance bananas, I cleared the shelves and brought home 7 pounds of bananas for a little over $2.00!
And I knew exactly what I was going to do with these guys!! I’ve been eyeing the Bananas Foster Baked Oatmeal at Oh She Glows. My kids love oatmeal and I thought this would be a little bit more special than their typical weekday morning oatmeal topped with raisins or thawed frozen fruit.
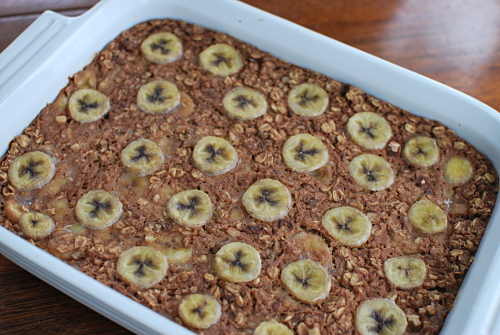
This was SO good – like a perfectly warm and cozy treat, very filling and not overly sweet. I love all of the healthy swaps from traditional bananas foster including coconut oil for butter and a maple syrup for the brown sugar. This will definitely be something that I make often!
Enjoy and have a wonderful weekend!!!
Bananas Foster Baked Oatmeal
Adapted from Oh She Glows
Oatmeal Ingredients
1 1/2 cups rolled oats
1/2 cup oat flour (finely ground oats, I’ve started grinding mine in a coffee grinder instead of the blender)
2 tsp. cinnamon
1 tsp. baking powder
1/2 cup walnuts, chopped
2 1/2 cups unsweetened, plain almond milk
Bananas Foster Ingredients
4 bananas, sliced (or chopped into small pieces if you prefer)
1 T. coconut oil
2 T. real Maple syrup
3 T. rum
Sprinkle of cinnamon
1 tsp. pure vanilla extract
Topping
1 banana, thinly sliced
Directions
Preheat oven to 350 degrees and lightly grease a casserole dish (I used coconut oil).
Combine all oatmeal ingredients in a large bowl and set aside while you prepare the bananas foster.
Add coconut oil, maple syrup, and rum to a cold skillet and heat over medium low heat. As the coconut oil begins to melt, whisk to combine ingredients. When mixture is bubbling, add in bananas and sprinkle with cinnamon. Saute for about 5 minutes, reducing heat if necessary. Remove from heat and stir in vanilla extract.
Stir bananas foster mixture into oatmeal and pour into casserole dish. Place sliced bananas on top and bake for 40-45 minutes.
Every Thursday night for the last 5 or 6 years, we have made homemade pizza for dinner. I’m not really sure where this little ritual came from, but it definitely makes my menu planning for the week a little bit easier!
Since this Thursday was Valentine’s Day, we had some fun with it and made….

It’s a lot of fun because we can each personalize our pizzas with our own toppings. Hailey’s standard is garlic butter (no red sauce!), cheese, and veggies. Jake is a pepperoni guy. Darren and I mix it up.

I almost always make mine on an Ezekiel 4:9 pocket bread (pita) and usually top it with mostly veggies and just a sprinkle of cheese.
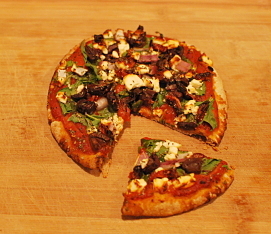
This one was Mediterranean Pizza with red sauce, lots of spinach, chopped red onion, kalamata olives, sundried tomatoes, and a little bit of crumbled feta cheese.
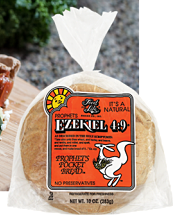
Ezekiel Pita Pockets – I LOVE these things!!!
I buy these at our local health food store where they are kept in the freezer. They are only $1.99 for 6 of them and make the best pizza crusts! They are made of all organic ingredients including whole wheat flour, carrots, barley flour, millet flour, lentil flour, spelt flour, soy flour, fresh yeast, and sea salt. They have 100 calories, 0.5 grams of fat, 21 carbs, 4 grams of fiber, and 7 grams of protein.
I just take one out of the freezer and top it and put it in the oven for about 10 minutes or so, depending on the toppings.
Either way that we make them, pizza night is always a favorite around here, especially when you get to eat a whole heart-shaped pizza!

Homemade Pizza Crust
1 1/2 cups water (heated to 110-115 degrees or a little over a minute in the microwave)
1 tsp honey
2 1/4 tsp yeast
1 tsp salt
2 T. extra virgin olive oil
3 1/2 cups flour, plus additional as needed (see note below)
Heat water to 110-115 degrees (important to be warm enough to activate the yeast but not too hot to kill it) and put into a large bowl. Stir in honey. Sprinkle yeast over top of the water and let stand for approximately 10 minutes until it is foamy on top (this is “proofing” the yeast and lets you know that its active) Add in salt, olive oil, and 3 cups of flour. Once everything is incorporated, turn out onto a floured mat. Knead dough and add more flour until the dough is slightly sticky but not tacky. Knead for about 5 minutes and then place into a well-oiled bowl. Cover with a clean dish towel and place in a warm dry area to rise (I set it in a corner of the counter near the oven). Dough can be ready in as little as 1 hour but I prefer to let the dough rise for closer to 2 hours or more.
Preheat oven to 425 degrees (we have found through trial and error that 400 degrees on convection is the perfect temp for us). Turn dough out onto the floured mat again and separate into 2 large crusts or 4 small crusts (great for individual pizzas) and roll out with a flour-dusted rolling pin. Place on an oiled pan and pre-bake for 7-8 minutes. Add desired toppings and bake for an additional 8-10 minutes until pizza is done to your liking. During the final baking stage, we prefer to cook the pizzas directly on the rack.
A note on flours – we originally started making these with all whole wheat pastry flour (or white whole wheat flour) as I wanted a 100% whole grain, healthy pizza crust. This is not going to give you the traditional pizza crust flavor that most people are expecting. You can try half whole wheat flour and half white flour to start. For us, I now like to use 1 cup white flour, 1 cup whole wheat pastry flour, and 1 cup of whole grain spelt flour (a grain similar to wheat). It may take some experimentation to see what you like.
Glad to have you back for another What I Ate Wednesday!
Yesterday’s post felt so BLAH to me!!!! I think its a lot easier for me when I write during the day but usually its just so hard to find that time!
Speaking of time…..I just somehow did not seem to have enough of it today!! And I can tell I must be settling into this blogging thing because I really and truly did not plan out a single thing that I was going to eat today. The only thought that goes into my WIAW’s are to try to mix it up to show you different things (when in reality I am a total creature of habit!!) and also to make sure to snap a picture.
So the theme of today’s eats – on the fly!
Breakfast was totally on the fly. I had a million things I had to get done in the three hours Jake was at school. I am not usually very hungry early in the morning so I basically just made something super quick so that I wouldn’t get hungry while running errands.
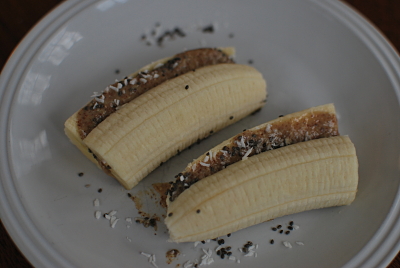
This is a banana with raw almond butter (from my imported Trader Joe’s stash), unsweetened coconut flakes, and chia seeds. This breakfast apologizes for not being very photogenic. But I know I must be onto something when both of my kids had this as an afternoon snack today!
Lunch was a bit of a scramble to pull something together. I started with some of the Butternut Squash Apple Curry soup from Monday. I paired it up with a repeat from last week – the chickpea “mock tuna” salad on Ezekiel bread. This is exactly why I take the time to make up things like this ahead of time (soup, chickpea salad, oatmeal bars, etc). Lunch was thrown together in less than 10 minutes, including making Jake’s lunch!

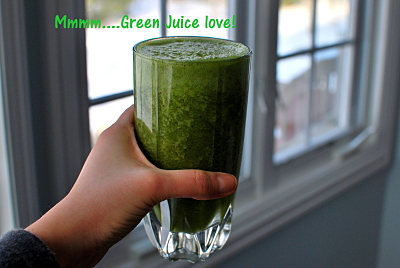
For my afternoon snack, since I didn’t have anything planned out of course, I kind of went over what I’d eaten today to see what I felt like I was missing. Decided on some more fruits and veggies, specifically GREENS! So I threw together one of my green juice/smoothie concoctions. This one had a handful of kale, handful of romaine, celery, 1/3 cucumber, an apple, 1/2 banana, and a handful of frozen grapes. I was surprised at how much the grapes mixed up the usual flavor. I know this picture doesn’t appeal to many, but its just how I roll! I swear by juice and smoothies like this for awesome energy every day!!! To me, they are a total pick me up!!
Good thing I was re-fueled because my afternoon included a whole lot of this………..

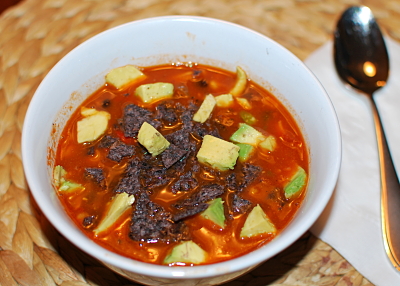
Dinner, again, was completely on the fly. We had planned to make jumbalaya but then I realized someone had used the leftover andouille sausage from the gumbo on Superbowl (I’ll give him some credit for using it very creatively on a pizza ;)). So I did a quick pantry/fridge check and came up with a mexican-inspired soup, similar to a tortilla soup. This was made completely with what I had on hand and I did not follow a recipe. I have to say it turned out pretty good. I realized that this is something that I could keep the ingredients on hand at all times to easily add this to my rotation of “throw together” dinners.
Mexican Chicken and Black Bean Soup
Ingredients
1 onion, chopped (could be chopped and frozen)
1 red pepper, chopped (could be chopped and frozen)
1 jalapeno, seeded and finely chopped
2 cloves garlic, minced
3 cups vegetable stock (chicken stock would work too)
1 can fire roasted crushed tomatoes (Muir Glen are organic AND bpa-free!)
shredded chicken (we had about 1 1/2 pieces of leftover grilled chicken)
1 can black beans (pinto beans would work too)
1 cup frozen corn (canned would work too)
2 tsp. ground cumin
1 tsp. chili powder
Toppings: shredded cheese, crushed tortilla chips, sour cream, avocado, cilantro – whatever you have!
Directions
In a large stock pot, saute the onion, pepper, jalapeno, and garlic in some olive oil over medium heat until softened. Add in crushed tomatoes, broth, shredded chicken, beans, corn, and seasonings and simmer for 20 minutes. Garnish with crushed chips (if you have leftover crumbs you can store them in the freezer for this purpose!), cheese, avocado, and/or cilantro.
Another option that I may try out would be to omit the chicken and use two different types of beans and a grain like rice or quinoa.
Well, that wraps it up. Happy Valentine’s day tomorrow!

We woke up to lots of new snow and a snow day for the kids this morning. Luckily, the sun was shining and it was such a great day to be outside playing.

Waist deep in snow!!
We have a pretty big hill in our front yard, which is great for sledding.

After many trips down the hill, a snowball fight with friends, and some snow angels, it was time to come inside for hot cocoa.

How do you make your hot cocoa?? Are you more of an instant packet type or do you make it from scratch? Do you jazz it up with little marshmallows or a candy cane stirrer???
For the past couple of years, I have been making hot cocoa for the kids by slightly modifying the recipe on the side of the Hershey’s cocoa powder container. There are a few simple upgrades that you can make to the recipe to make it a little healthier.

Start with some milk (your preference, we use non-dairy almond milk), either traditional cocoa powder or raw cacao powder, maple syrup or Stevia, and pure vanilla extract.
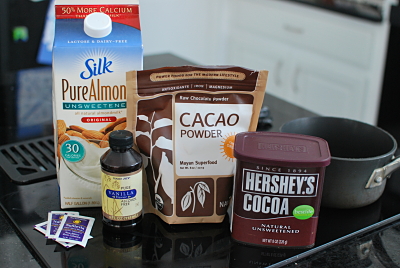
Cacao is the original source of chocolate and cocoa. It is processed very carefully at low temperatures so that it retains the vitamins and minerals and contains more antioxidant flavonoids than red wine, green tea and blueberries
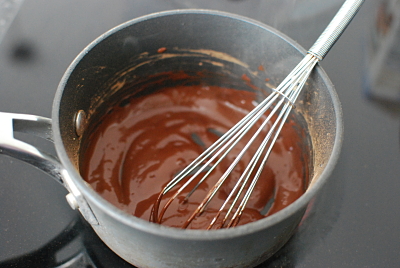
In a small pan, mix 4 tsp. cocoa powder, 3T. maple syrup, and 1 T. water. Whisk over medium heat until it is bubbling, being careful not to scorch it.
If want an all natural zero-calorie sweetener, you can swap out the maple syrup for Stevia, which comes from a plant native to South America. It does have a unique taste but I don’t mind it in small doses. (swap out the maple syrup and water for 2 packets of Stevia and 2 T. of water).
When I am making hot cocoa for other kids though, I use the maple syrup for a sweet taste that they are more familiar with.
Add in 2 cups of milk and stir to combine. Gently heat milk to desired temperature but do not boil. Remove from heat and stir in 1/4 teaspoon of vanilla extract.

Enjoy all of the beautiful snow this weekend! Stay warm and stay safe!
I am quite obsessed with kale. When I combine my finance background with my love for nutrition, the reasoning goes something like this – you simply cannot get more nutritional bang for your buck when it comes to kale!!!! For a mere $1.49, I can get a bunch of kale so big that I have to wrestle it into the bag. I must look like I’m losing the battle sometimes because I have had people in the grocery store ask me what it is that I am buying!

There are a lot of reasons why kale is considered one of the healthiest vegetables on the planet.
The Nutritional Details: One cup of kale contains 36 calories, 5 grams of fiber, and 15% of the daily requirement of calcium and vitamin B6 (pyridoxine), 40% of magnesium, 180% of vitamin A, 200% of vitamin C, and 1,020% of vitamin K. It is also a good source of minerals copper, potassium, iron, manganese, and phosphorus. (SOURCE)
What does all of that mean???
- Kale is a rich source of antioxidant vitamins A, C, and K, fiber and carotenoids. Research has shown that kale contains 45 different flavonoids with a variety of antioxidant and anti-inflammatory properties.
- It is a very potent source of vitamin K, which can reduce the overall risk of developing cancer, according to a study in the American Journal of Clinical Nutrition.
- Kale is one of the best sources of beta-carotene, one of the antioxidants believed by many nutrition experts to be a major player in the battle against cancer, heart disease, and certain age-related chronic diseases.
- Kale possesses other important carotenoids: lutein and zeaxathin. These help keep UV rays from damaging the eyes and causing cataracts.
- According to recent research results, kale is an incredible source of well-absorbed calcium, which is one of the many factors that may help prevent osteoporosis.
- The manganese in kale helps your body’s own antioxidant defense system, protecting you from damaging free radicals.
- Its folate and B6 team up to keep homocysteine levels down, which may help prevent heart disease, dementia, and osteoporosis bone fractures.
- Beyond antioxidants, the fiber content of cruciferous kale binds bile acids and helps lower blood cholesterol levels and reduce the risk of heart disease, especially when kale is cooked instead of raw.
Something else I found particularly interesting is that kale contains indole-3- carbinol, a nutrient that seems to play a role in how estrogen is metabolized in the body and may play a protective role against breast cancer. According to the naturopathic physician quoted in this article, “We sometimes use it as a supplement in patients with breast cancer, anyone who has a reason to be concerned about developing breast cancer and for those with estrogen-dominant illnesses like fibroids, fibrocystic breast disease or endometriosis, to try to help modulate negative estrogenic effects in the body. Eating kale is a natural way to do that.”
With all that being said, I learned a couple of years ago when my mom was experiencing some heart problems that the high amount of vitamin K can cause problems for some people. Anyone taking anticoagulants (blood thinners, such as Warfarin, Coumadin, etc) or other medications should avoid kale because the high level of vitamin K may interfere with the drugs. Please consult your doctor before adding or increasing the amount of kale and other greens to your diet.
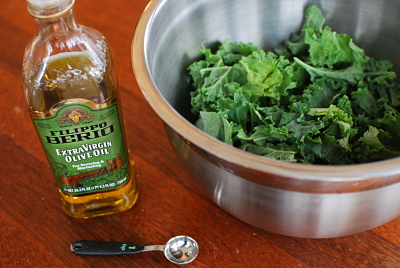
But for those who are looking to add more of this SUPERFOOD to their diet, I highly suggest starting with kale chips!!!
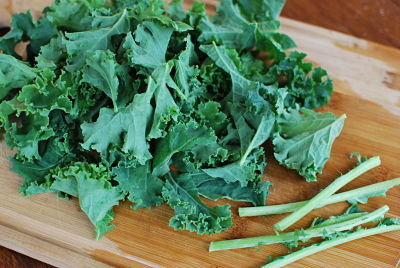
Start by removing the tough stem from the center of each stalk. This part can taste bitter. Tear the remaining leaves into bite-sized pieces.
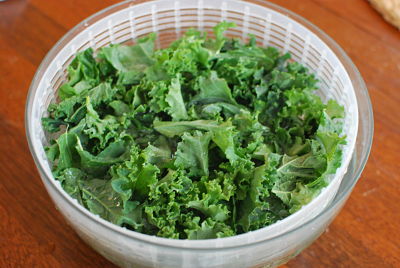
Wash and dry kale (I use a salad spinner)
With clean hands, massage kale leaves with extra virgin olive oil to get them completely coated. For reference, I used about 2 teaspoons of oil for a whole head of kale.
Spread on a SINGLE layer on a baking sheet (or two sheets if necessary). Sprinkle with coarse ground kosher salt. For this batch, I used about 1/2 teaspoon.
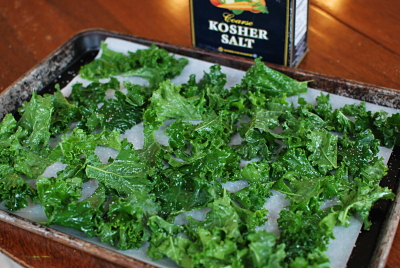
Bake at 375 degrees for 10 to 15 minutes. Start checking the kale chips around 12 minutes as you will want them to be super crispy, but not burnt. Mine are usually perfect around 14 minutes. I just taste as I go, which depletes about half the pan!
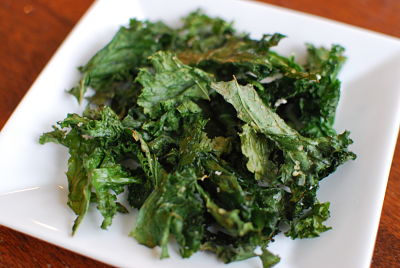
With the kids helping me, we can usually eat an entire batch in one sitting. And by sitting, I mean standing over the pan shoving them in our mouths!!!
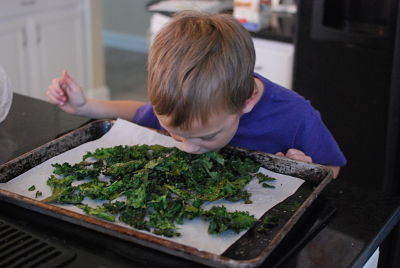
Look Mom—no hands!!!
There are a TON of variations all over the internet. But this classic version is quick, easy, and SO good! I hope you’ll give them a try!
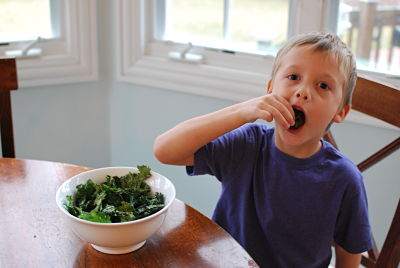
Without a doubt, carrot cake is my all time favorite dessert. Next up might be key lime pie. Oddly enough, chocolate desserts usually aren’t on my radar.
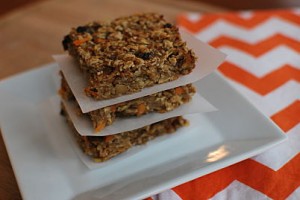
I’ve tried numerous recipes to make a lighter, healthier carrot cake but just haven’t quite nailed it yet. In the meantime, I still love the flavor combination, so when I saw this snack bar recipe over at Happy Healthy Mama, I knew I could tweak it just a bit to make it more like carrot cake.
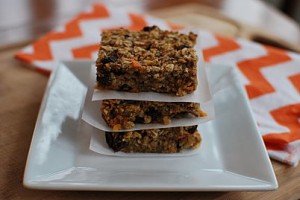
Needless to say these have been a huge hit around here!! There is so much nutrition packed into these little squares!!! Fruits, vegetables, oats, healthy fats, and Omega 3 fatty acids all sweetened naturally for an awesome on-the-go snack or breakfast!!
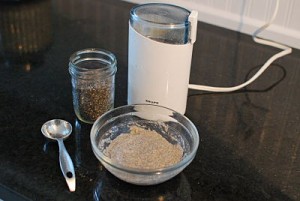
The original recipe called for eggs as the binder. Feel free to make them this way if you prefer or if it is what you have on hand. I decided to experiment with swapping out the eggs for a chia “egg” which is a common substitute in vegan baking. Since the kids have been eating eggs a lot for breakfast, I felt like this was a good place to reduce the egg and swap in something with a little more nutritional oomph. Chia seeds are an excellent source of plant-based calcium, protein and Omega 3 fatty acids. Since I haven’t made the original, I can’t compare the texture between the two, but we’ve been happy with them this way.
I have made chia gel or chia “eggs” two different ways now. The ratio is 1 tablespoon of chia seeds to 3 tablespoons of water – this will yield the equivalent of 1 egg. You can simply mix the whole chia seeds into a bowl of water or grind the seeds in a coffee grinder first and then mix with the water.
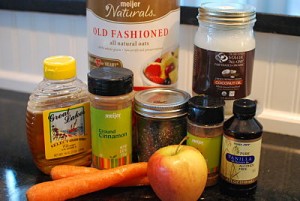
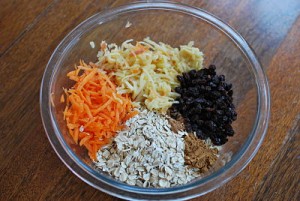
So lets make some oatmeal squares!!! Gather all of your ingredients – I love this recipe because I almost always have these ingredients on hand!
To make a chia egg, add 2 T. of ground chia seeds to a small bowl with 6 T. water. Mix with a fork and set aside while you prepare the rest of the ingredients.
Into a large bowl, add oats, shredded carrots, shredded apple, raisins, and spices.
Combine wet ingredients: melted coconut oil, honey, and vanilla. Add to bowl along with gelled chia “egg”.
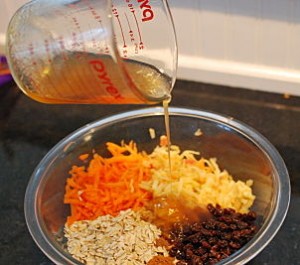
Mix wet and dry ingredients and press into a greased 8 X 8 pan (I greased mine with a little coconut oil).
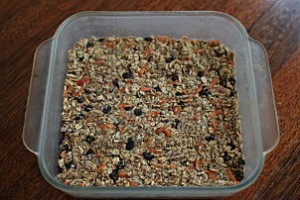
Bake at 350 degrees for 30 minutes. Cool in pan before cutting into squares. I have also found that I prefer to take these out of the pan to sit on a cooling rack for awhile. This seems to help the bottom “dry out” a little. I store them in a storage container in the fridge. They don’t last long around here 
Carrot Cake Oatmeal Squares
Inspired by Happy Healthy Mama
2 T. chia seeds, ground in coffee grinder (or sub 2 regular eggs)
2 Cups Old-Fashioned Oats
2 small-medium sized carrots, grated (or 1 large carrot)
1 apple, grated
Scant 1/2 cup raisins
1 tsp. ground cinnamon
1/2 tsp. nutmeg
1/4 tsp. ground allspice
1/4 tsp. ground ginger
1/3 Cup honey
1/3 Cup coconut oil, melted
1 tsp. pure vanilla extract
Extra coconut oil for pan
Directions
Preheat oven to 350 degrees and grease an 8 X 8 pan with coconut oil. Grind 2 T. chia seeds in a clean coffee grinder. Mix with 6 T. water in a small bowl and set aside to “gel”.
In a large bowl, combine oats, shredded carrots, shredded apples, raisins, and spices.
In a small bowl or glass measuring cup, combine melted coconut oil, honey and vanilla extract.
Pour liquid ingredients and thickened chia “gel” into oat mixture and mix well. Press down into an 8 X 8 pan and bake for 30 minutes. Let cool in pan before slicing into squares. Remove from pan to finish cooling on a rack.
“One of the greatest opportunities to live our values – or betray them – lies in the food we put on our plates” -Jonathan Saffran Foer, Eating Animals
Ever since reading books like “Omnivore’s Dilemma” and “Eating Animals” and seeing the movie “Forks Over Knives“, I have made an effort to limit my consumption of animal products including meat, fish, dairy and eggs. This isn’t to say that I don’t eat these things. I just try to limit them in my diet. I think there are so many compelling reasons to cut back on meat consumption. For me, these include the global and environmental impact of factory farming, the painful truth about the conditions in which the animals are raised and slaughtered, and the health implications of consuming animal protein. While I was trying to make sense of the information that I was learning, I thought the answer was to purchase organic or farm-raised meat and dairy. But after reading The China Study and seeing the documentary “Forks Over Knives”, I learned that degenerative diseases such as diabetes and heart disease and some forms of cancer have all been linked to the consumption of animal protein, some of which can be reversed through a plant-based diet. Seeing as how these diseases run in my family, I made the decision to start experimenting with more plant-based recipes and make a concerted effort to cut back on animal protein.
For our family, a flexitarian approach works best. My husband prefers to eat a higher protein diet and our kids don’t care for meat very much – either way, I would never force anyone to change or eat something they don’t want. I tried to cut out all meat completely for a couple of years, but in the end it was just too much trying to cook different meals to please everyone. I could take a simple classic like Broccoli, Cheese, and Chicken Casserole and spend an hour and a half making it three different ways: traditional style with a homemade soup base (no canned soups for us!) with the chicken and cheese, some without the chicken, and mine with a cashew “cheeze” sauce and no chicken. It just couldn’t go on that way every night for dinner! I also wasn’t happy with the amount of mock-meat substitutes that I was relying on in order to feed everyone a similar dinner. Therefore I have tried to simplify our meals by cooking a couple of vegetarian meals a week and include some meat the rest of the week for each person to choose whether or not they want to include it.
This is a decision that I am very much at peace with now. Most days, I eat vegetarian or vegan until dinner. When we do include animal protein, I try to buy the most humanely raised meat, eggs and dairy that I can reasonably locate and can afford. I feel like it has brought a little bit of balance back to my diet and I am a much more sane and happy person when it comes time to make dinner.
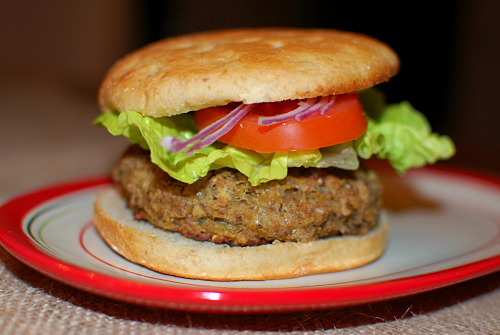
Tonights dinner was a new-to-us vegetarian recipe that was cut out of the newspaper by my husband. I always try to make any vegetarian recipes he suggests since he is the most apprehensive about meatless dishes. This one was a veggie burger from “The Meat-Free Monday Cookbook” by Paul McCartney and his daughters, Stella and Mary. It had great “meaty” flavor and just a hint of spice and held together very well compared to other veggie burger recipes I’ve made. Even my kids gave it the thumbs up. That is a winner in my book!
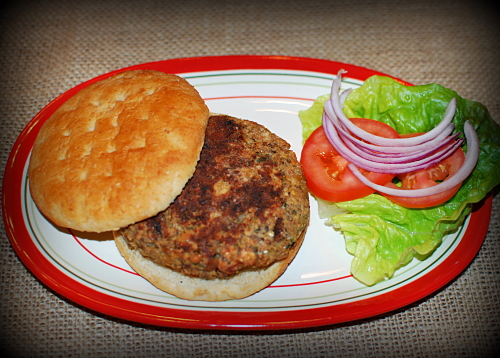
Chickpea, Cheese & Onion Burgers
Adapted from “The Meat-Free Monday Cookbook”
3 T. olive oil, divided
1 medium onion, chopped
2 cloves garlic, minced
1 tsp. ground cumin
1/4 tsp cayenne pepper (I probably used closer to 1/8 tsp)
1 can garbanzo beans, drained and rinsed
1 1/2 cups cooked lentils (I use the pre-cooked lentils from Trader Joes)
1 T. tahini
2 T. fresh parsley, chopped
1 egg, beaten
2 cups fresh breadcrumbs (see directions below)
1 1/2 cups swiss cheese, shredded
1/2 tsp. salt
Flour, for dusting
Directions
For fresh breadcrumbs, toast 4 slices of Ezekial sprouted grain bread. Pulse in a food processor until breadcrumb consistency and set aside.
Heat 1 tablespoon of olive oil in a large skillet. Add onion and cook over medium heat until tender. Add garlic, cumin and cayenne, and cook 30 seconds. Remove from the heat.
Put lentils and chickpeas into the bowl of a food processor and pulse until coarsely chopped. Add onion mixture, tahini and parsley, and pulse again until combined and nearly smooth. Spoon into a large bowl and add egg, breadcrumbs and cheese. Mix using your hands and add salt and pepper. Shape into patties and lightly dust with flour.
Heat remaining oil in a large skillet (I used my cast iron which gave them a nice “crust” on the outside). Place burgers in pan cook until golden on both sides (about 5 minutes per side).
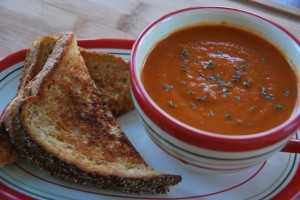
Tomato soup and grilled cheese. No doubt, one of the most simple comforting meals around, especially this time of year.
I love this as a quick weeknight dinner or to make ahead for lunches throughout the week. And it was through trial and error that I realized how much my kids love this soup. I had made a basic tomato vegetable soup for dinner one night. The kids were just picking at it when Hailey informed me that she would like it better if it was “smooth” tomato soup. So, a quick zip with the immersion blender and I had a new family favorite on our hands. I had made basic tomato soup before, but now I realized I could hide a few extra veggies in there and still pass it off as tomato soup! Genius!! Oh wait, Jessica Seinfeld already did that Oh well……
The ingredients are fairly simple and the extra veggies can vary by what you have on hand or what is in season. My biggest issue that I struggle with is the canned tomatoes. By now, I’m sure most everyone has heard news stories of BPA (or bisphenol A). It is a chemical that is used to harden plastic. It is found in everything from plastic water bottles and storage containers to cash register receipts and medical devices. Unfortunately, it is also present in canned goods. And it is actually more dangerous in canned tomatoes over other canned goods as the high acidity in tomatoes requires an even higher amount of the chemical in the cans, and therefore even more BPA is leached into the food.

BPA had been considered safe by the U.S. Food and Drug Administration until 2010 when the agency altered its position and expressed “some concern” about the potential effects on the brain, behavior, and prostate glands in fetuses, infants, and young children. Studies have linked BPA exposure to hormonal disruptions, brain and behavior problems, cancer, heart problems, and other diseases. And unfortunately, the effects are most pronounced in infants and young children as their developing bodies are less efficient at eliminating the substance.
The good news is that consumer awareness and demand are convincing manufacturers to begin phasing it out of many plastic products. Some states have banned the sale of certain products such as bottles and sippy cups made with BPA. It is possible to reduce exposure to BPA by using BPA-free products, using non-plastic containers for food, and using less canned foods when possible.
Which leads me to the tomatoes. The most readily available option that I have found that does not contain BPA is Pomi Chopped Tomatoes, which come in a tetra pak (box). Of course, these are a bit more expensive than traditional canned tomatoes. I try to stock up on them when they go on sale and definitely freeze any portion that I do not use. When debating whether or not to go with a more natural/organic/expensive product, I usually weigh in the amount of the item we consume, and particularly how much my children consume. Given that we use canned tomatoes so often in soups, casseroles, etc, I try to opt for the Pomi boxed tomatoes the majority of the time or as often as my grocery budget allows. Other options would be using your own canned tomatoes (something I’d eventually like to try!) or simply boiling whole roma tomatoes for a minute or two, and peeling them once cooled.
Lets make some soup!
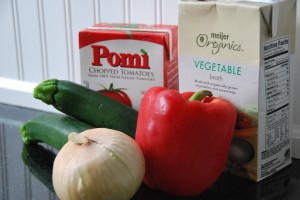
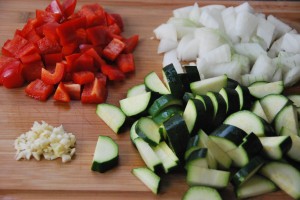
Chop all veggies into uniform pieces.
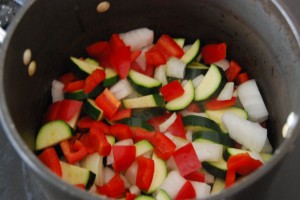
Heat a large pot (preferrably NOT a non-stick) over medium heat. Add the olive oil and veggies and saute approximately 5-7 minutes until soft.
Add in tomatoes, broth and seasonings. Bring to a low boil and reduce heat. Simmer for 15 minutes.
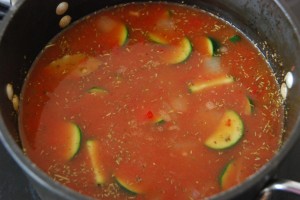
Remove the bay leaf. Blend with an immersion blender (or in batches in a traditional blender) until smooth.

The most recent time I made this soup, we happen to have a small amount of organic creamer left from the holidays (not something I normally have on hand). While I think this soup is really good without it, just a small amount makes it great (a bit more like a tomato bisque but much healthier)!

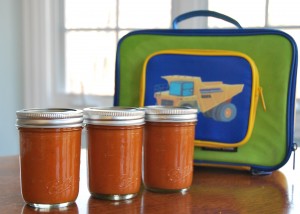
And since one of my New Year’s resolutions is to focus on improving the foods that my kids are eating, I’ve made a double batch of this soup to freeze in small glass jars. I can defrost it in the refrigerator overnight, and then heat it up in the morning and pack it in a Thermos in the lunchbox. Along with some whole grain crackers and string cheese or a whole wheat quesadilla and some fruit, this has become one of my kids favorite cold-weather school lunches!
Tomato Soup with a Twist
1 26 oz. box Pomi chopped tomatoes
1 32 oz. box organic vegetable broth (or other non-msg containing broth)
1 T. oil (extra virgin olive oil or grapeseed oil)
1 medium onion
2 small zucchini
1 bell pepper (red, yellow, or orange)
2 cloves garlic, minced
1 bay leaf
1/2 tsp. Italian seasoning blend
1/2 tsp. dried rosemary
1/2 tsp. kosher salt
1/4 cup organic dairy creamer (half and half)
Directions
Chop all vegetables into medium-size pieces. Heat oil over medium heat. Saute vegetables over medium heat 5-7 minutes, adding in garlic during last few minutes so that it does not burn. Add broth, chopped tomatoes, and seasonings and simmer for 15 minutes. Remove bay leaf and blend with an immersion blender or in a traditional blender in 2 batches. Taste for additional salt and pepper if desired. Blend in optional creamer if using.
I have decided that one of my goals this year is to focus a little more on better nutrition for my two kids. I probably love healthy eating more than the average person – I feel my best when my days are full of green juice, chia pudding, and kale salads and truly enjoy eating this way. But over the past year or so, I have found that while I’m experimenting with new recipes for myself to enjoy, I am falling back into old habits and feeding my kids more processed foods during the day than I would like. So, I’d like to work on swapping out some of their packaged snack foods for more nutritious, real foods.
I am a busy parent of two kids with time and budget constraints just like everyone else. I realize just how convenient it is to toss a granola or cereal bar in the backpack for a snack. But a recent review of the approximately 45 different ingredients in Kellogg’s Nutri Grain Bars (8 of them being different forms of sugar, many ingredients that I cannot pronounce, artificial flavors, and artificial food colorings) leaves me feeling like I can easily do better than this. With just a little effort, I can have make a homemade snack that is not full of an entire day’s worth of sugar, genetically modified foods, and unrecognizable ingredients and still gets the thumbs up from my family.
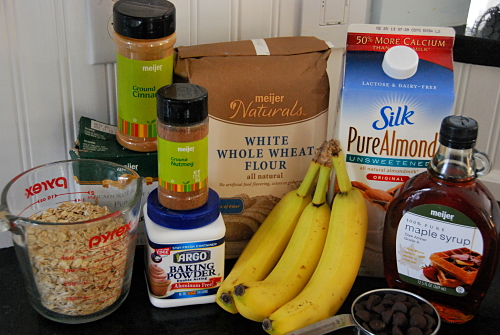
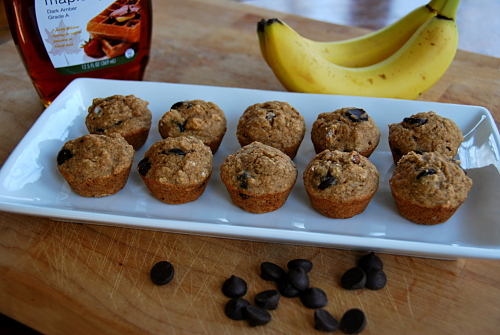
So, this week I baked up a batch of one of our favorite muffins to pack as a snack throughout the week. My kids love these mini banana chocolate chip muffins based off of the Oil-free Vegan Banana Bread by the vegan cookbook author Dreena Burton of Plant Powered Kitchen. I love that these muffins are full of REAL food ingredients – with no white flour, no white sugar, and no oil. With the addition of a few chocolate chips, my kids think they are getting a treat when in reality they are getting less sugar than a pre-packaged granola bar!
Mini Banana Chocolate Chip Muffins
Adapted from the recipe by Dreena Burton
1 cup white whole-wheat flour or whole-wheat pastry flour
3/4 cup oat flour (oats finely ground in a blender or coffee grinder – grind first, then measure)
2 tsp baking powder
1/2 tsp baking soda
1/2 tsp cinnamon
1/4 tsp ground nutmeg
1/4 tsp salt
1 cup pureed overripe banana (puree bananas in deep cup with an immersion blender, or in a blender or mini food processor. Puree first, then measure)
1/2 cup pure maple syrup
1/2 cup plain unsweetened non-dairy milk (I like almond milk, but you can use soy or other)
1 tsp pure vanilla extract
1/2 cup chocolate chips
Preheat oven to 350. In a large bowl, mix dry ingredients. In a separate bowl, combine mashed banana, maple syrup, almond milk, and vanilla. Add wet mixture to dry, fold in chocolate chips, and stir until just combined (very important not to overmix). Lightly grease a mini muffin pan (I use a Misto sprayer filled with grapeseed oil) and fill 2/3 of the way full. Bake for approximately 15 minutes, just until a toothpick comes out clean. Makes approximately 2 1/2 dozen mini muffins.
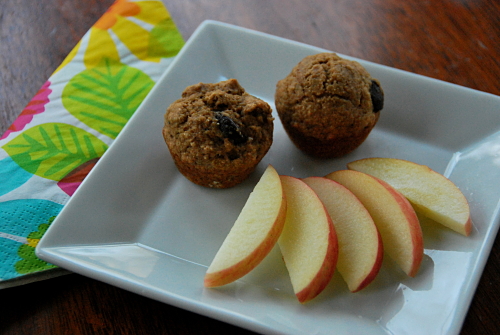
My kids will be enjoying a couple of these mini muffins with a few apple slices as their afternoon snack this week! I hope you enjoy them too.