Welcome!
 Hi, I'm Tori! Welcome to Healthy Plate Happy Family!
I am a fun-loving, healthy-eating, wife, mom, holistic
nutrition student, aspiring yogi, SUP-enthusiast, living
and loving life on the beautiful coast of West Michigan.
Here you'll find all of the whole foods, clean-eating recipes
that I am cooking up to keep my family happy and healthy!
Thanks for stopping by!
Hi, I'm Tori! Welcome to Healthy Plate Happy Family!
I am a fun-loving, healthy-eating, wife, mom, holistic
nutrition student, aspiring yogi, SUP-enthusiast, living
and loving life on the beautiful coast of West Michigan.
Here you'll find all of the whole foods, clean-eating recipes
that I am cooking up to keep my family happy and healthy!
Thanks for stopping by!


This past Spring Break, we took a family trip out to California….and pretty much fell in love with it. We especially loved Southern California! Luckily, being in the Stand Up Paddleboard business, we have a lot of opportunities to travel out there. Actually, Darren just spent a week in Laguna Beach and Coronado for some meetings, networking, and a race. I loved seeing all of the pictures, but was kind of bummed that I didn’t get to make the trip with him this time. I shouldn’t complain too much since we have some pretty awesome beaches and trails near us. Whenever I need my “beach fix” I just head across the street to this….

Today was the perfect day for a jog on the trails –
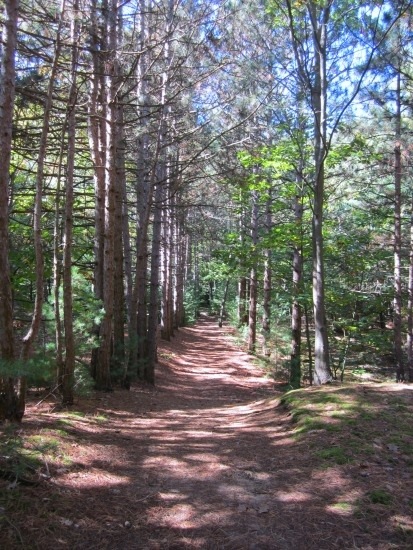
running the stairs-

and a cool down walk on the beach –

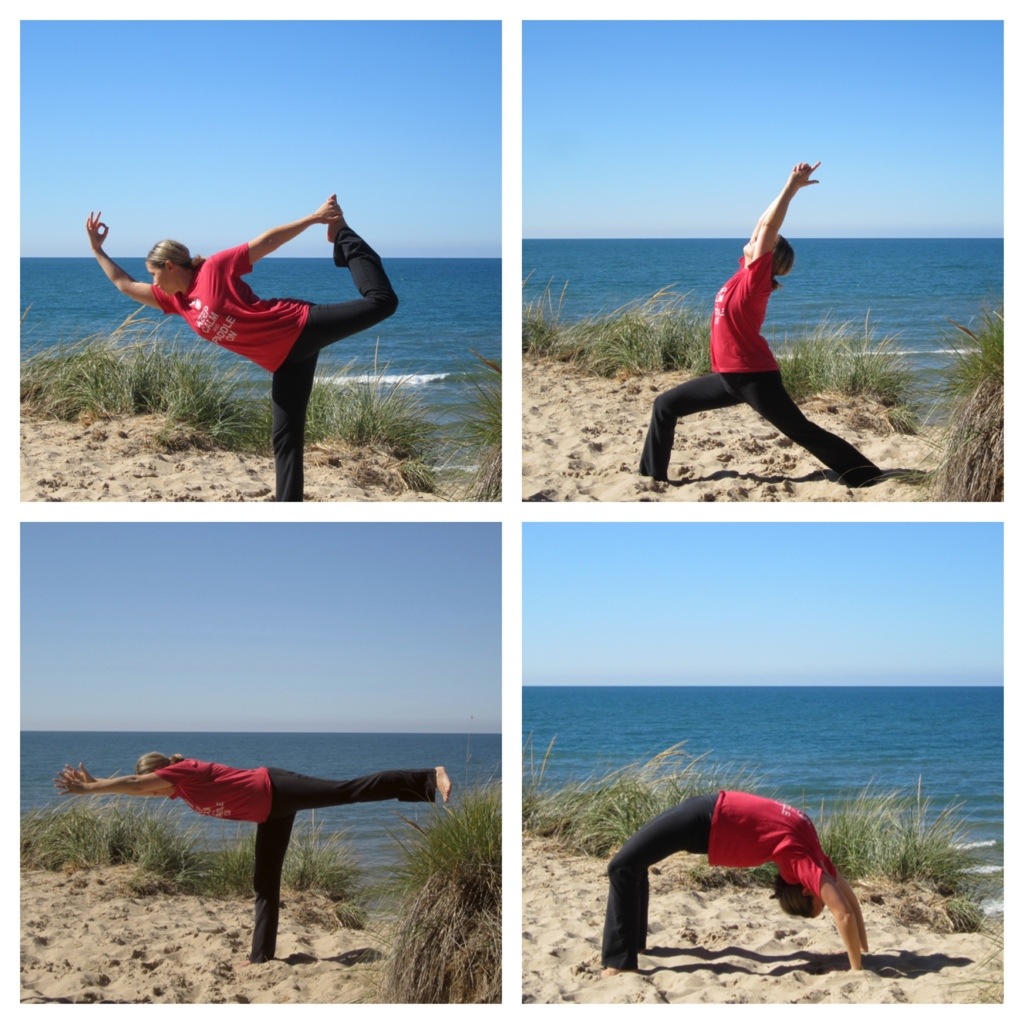
Ending with a few yoga poses since I missed my usual class this morning.
I was definitely ready for lunch by the time I got home! It only seemed fitting to make this quinoa salad inspired by the flavors of California. My fellow SUP and yoga-loving friend made this for me this summer and I completely forgot about it until just recently.
It’s a lot of chopping…..

But I promise it’s worth it!

California Quinoa Salad
Ingredients (amounts are estimates, use more or less based on your taste preference!)
1 cup quinoa (red, white or a mix)
1 ripe mango, diced
1/4 large red onion, finely chopped
1/2 red pepper, chopped
1/2 cup pre-steamed or frozen edamame (shelled)
1/2 cup sliced or slivered almonds, toasted
1/2 avocado, diced
1/2 cup dried cranberries, cherries, or raisins
1/2 cup shredded, unsweetened coconut
handful of cilantro, chopped
2 T. balsamic vinegar (she suggests fig vinegar if you have it, but I used balsamic)
juice of 1/2 of a lime
1 T. olive oil
Directions
Rinse quinoa and cook according to package. I usually bring mine to a low boil (covered) for about 15 minutes and then let it sit covered off the heat for another 10 minutes. Place in a dish to cool in the refrigerator for a few hours.
Chop all veggies and toast almonds if necessary.
Mix balsamic, lime juice, and olive oil.
Combine cooled quinoa with all of the other ingredients and toss with dressing. Season with a little sea salt and fresh ground pepper.
I have been trying to branch out from standard store-bought hummus lately. It gets a bit pricey since we eat so much of it. But also, I just wanted to mix it up a little bit and try something different.
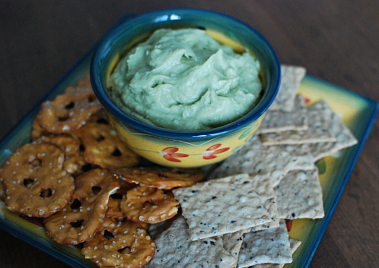
When I saw this dip on Pinterest, I just knew it would be a winner! Not exactly hummus, but more of a hummus guacamole blend. Quick, easy, kid friendly, versatile, and tastes great. What more can you ask for?!?
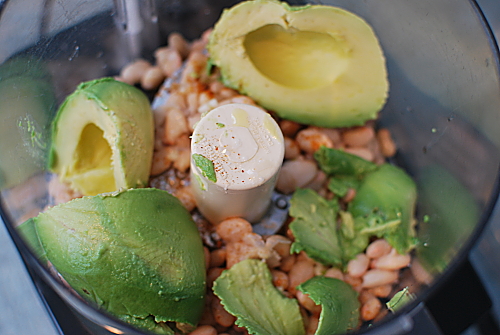
Avocado and White Bean Dip
First things first, I always wash my produce before I cut into it since this can transfer germs from the outside into the fruit or vegetable that you’re cutting!
Slice the avocado length-wise all the way around and twist to open. Using a large sharp knife, give it a good whack into the pit and twist to remove it (see this youtube tutorial if you’re not familiar with this method of pitting an avocado).
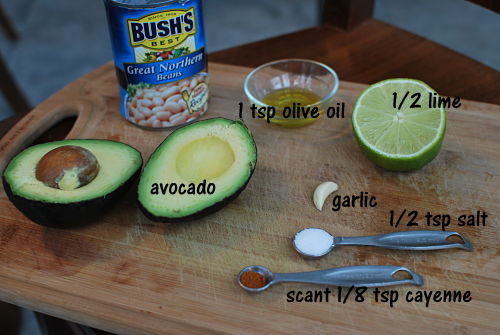
Scoop the avocado flesh out and place it into the bowl of a food processor fitted with the “S” blade. Squeeze the juice from the lime half into the bowl and add the remaining ingredients.
Place the lid on the food processor and process until smooth.
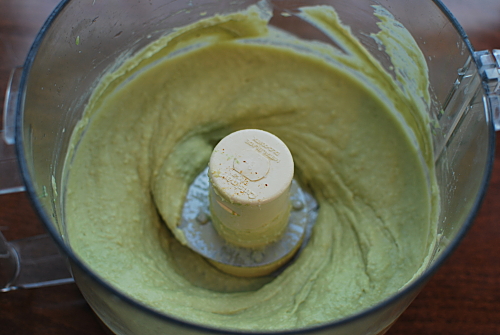
And in less than 10 minutes, you will have white bean and avocado dip packed with fiber (roughly 10 grams per serving!) and nearly 20 different vitamins, minerals, and phytonutrients. I especially like that you can store this dip in the refrigerator for a few days without it turning brown like traditional guacamole.
You can serve this with a combination of raw veggies and crackers (I prefer gluten-free rice crackers) or other chips (tortilla, pretzel chips, etc) for an appetizer or well-balanced snack.
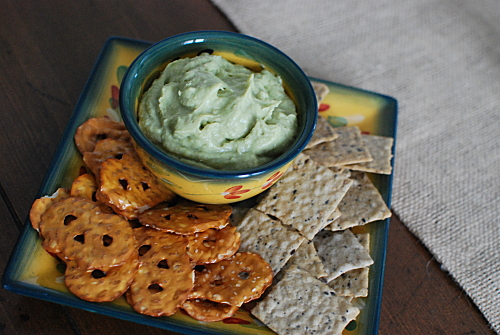
Avocado and White Bean Dip
Ingredients
1 ripe avocado
1 can of Great Northern beans, drained and rinsed well
1 /2 lime
1 tsp extra virgin olive oil
1 clove garlic, minced
1/2 tsp kosher salt
1/8 tsp cayenne pepper (or to taste)
Directions
Add the flesh of one avocado, the juice of 1/2 of a lime, olive oil, minced garlic, kosher salt, and cayenne pepper to the bowl of a food processor fitted with the “S” blade. Process until smooth. Adjust seasonings to your liking (more lime, salt, or cayenne). Serve with veggies, chips, or crackers.
I had every intention of actually getting this post up on Monday, the one day during the week that I commit to making a vegetarian dinner for our family. But an interesting opportunity came up that changed up my plans at the last minute. I found out that a local chiropractor was showing the documentary “Doctored” so of course I needed to take advantage of the opportunity to socialize with some of my fellow health nuts!!

Overall, I liked the movie and found some of the facts presented to be very eye-opening. For example, did you know that “although the U.S. makes up only 5% of the world’s population, we consume over 50% of all the world’s pharmaceutical drugs?” I think that is shocking!
The movie is centered on the chiropractic profession and their struggle against “big business” and the American Medical Association. Although I felt like the movie lost focus near the end, they still managed to make the point that there are very effective alternative treatments available for many of the pains and illnesses that plague us. Whether your medications and current approach aren’t working, or you would like to explore an alternative to prescription drugs and surgery, it is important to educate yourself of other options besides our traditional Western medicine. Our family, personally, has had amazing success with chiropractic care. I won’t go into too much detail here, but years ago, we successfully treated our daughter’s asthma diagnosis through chiropractic adjustments. I am a firm believer in the healing energy within our own bodies.
It was incredible to see the examples of cases they presented where debilitating chronic pain was resolved through something as simple as chiropractic adjustments as well as proper diet and nutrition.
Proper nutrition….my favorite subject.
So lets get going with this healthy vegetarian-friendly soup! Its Butternut Squash Apple Curry soup based off of this recipe from one of my favorite classical chefs, Ina Garten, better known as the Barefoot Contessa.
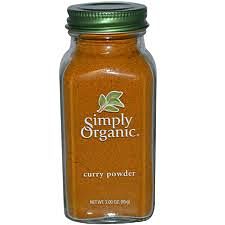
I first made this recipe because I wanted to experiment with curry powder in a recipe after learning some of its health benefits. Curry powder is a mixture of spices including turmeric and curcumin. Turmeric has been found to reduce inflammation of the joints. Some studies suggest that turmeric may also help protect us against cancer, heart disease and even Alzheimer’s disease. Studies done at one of the world’s most renowned cancer centers, MD Anderson Center in Texas, have shown that curcumin seems to turn off genes that can trigger the onset and spread of breast cancer. It also shows some promise, in a handful of patients, in stabilizing pancreatic cancer. Who knew all of that power was there in a little spoonful of spices???
I like to start this recipe ahead of time by roasting a butternut squash the night before I plan to make the soup (usually while our dinner is cooking or afterwards, while the oven is still hot). Slice the squash in half and remove the seeds. Brush a little olive oil on the cut surfaces and place it cut-side down on a baking sheet. Roast at 350 degrees for an hour (up to an hour and a half depending on size), until the squash is golden and soft. Once it has cooled, scoop the flesh of the squash from the skin and store it in the refrigerator until you are ready to proceed with the soup. The soup comes together quickly after the squash has been roasted!
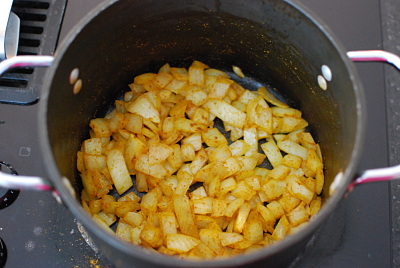
Next, saute a chopped onion and 2 tsp. of curry powder in olive oil, grass-fed butter, or ghee. If it starts to dry out, add a little bit of vegetable stock – this is a great way to cut back on the amount of butter and oil used.
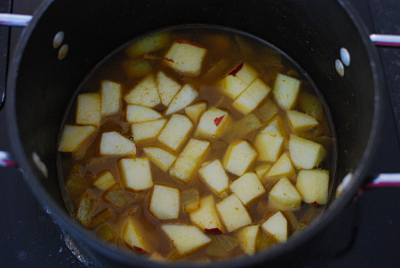
After about 10 minutes, add in 2-3 peeled, cored, and chopped apples and 2 cups of vegetable stock. Let this simmer for about 8 minutes until the apples are soft.
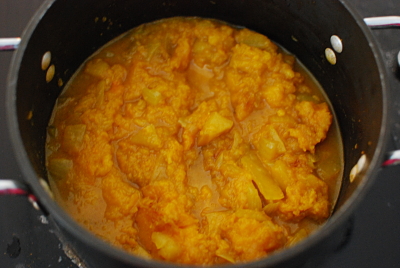
Add in the roasted and peeled butternut squash, 1/2 tsp. kosher salt and 2 cups apple cider. To get the right taste, be sure to use cider and not apple juice.

Mix to incorporate everything and let this cook for a few minutes until the squash is heated.
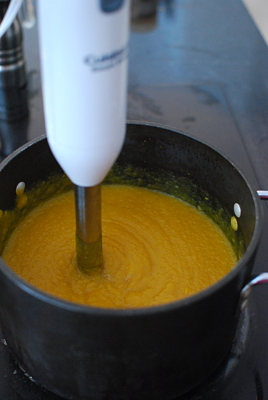
Puree with an immersion blender and adjust seasonings to taste.
If you want it spicier, add more curry. If it doesn’t taste sweet enough to you, add a bit more apple cider. The flavor of the soup can vary quite a bit based on the size and flavor of the apples and squash. Also, you can adjust the thickness of the soup to your liking by adding more broth, cider, or even water. When I reheat this soup for lunch later in the week, I always need to thin it out more with about half a cup of liquid.

Paired with some good bread and a salad of mixed greens, pears or apples, red onion and toasted nuts, it makes a great vegetarian lunch or dinner and is a great use of seasonal produce.
Butternut Squash Curry Soup
Recipe adapted from here
Ingredients
1 large butternut squash (roasted ahead of time, cut-side down on a baking sheet at 350 degrees for about an hour)
1 sweet onion, chopped
2 tsp. olive oil, butter, or ghee
2 tsp. – 1 T. of curry powder, depending on how spicy you want it
2-3 apples, peeled, cored, and chopped
2 cups vegetable stock (optional, can just use water)
1/2 tsp. sea salt or to taste (adjust as necessary)
fresh ground black pepper
2 cups good quality apple cider
Directions
Roast butternut squash ahead of time. Cool and scrape squash from peel. This can be done 1-2 days in advance and kept in the refrigerator.
Heat a dutch oven or stock pot over medium heat. Add olive oil and/or butter to pan. Saute chopped onion and curry powder for about 10 minutes, until onions are soft and translucent. If onions begin to stick, add a splash of vegetable stock or water to the pan.
After 10 minutes, add peeled, chopped apples, cooked butternut squash and 2 cups of water or vegetable stock and simmer covered over low heat for another 10 minutes.
Remove from heat. Add 1 cup of apple cider, 1/2 tsp. salt and some fresh ground pepper and puree with an immersion blender. Alternatively, you can puree the soup in a blender in batches. Add up to an additional cup of apple cider. Taste and adjust seasonings as desired. This soup tastes better after it sits and flavors have developed.
Did anyone else have lots of yummy party food for the Superbowl yesterday???
This football-obsessed household loves having an excuse to make some of our favorite tailgating recipes and party appetizers! In honor of the game being held in New Orleans, of course we had to make Gumbo (using organic chicken andouille sausage and amped up with lots of spicy creole seasoning), along with Caesar salad (dressing made with Vegenaise soy-free mayo and minus the anchovy paste), and soft pretzel bites with beer cheese dip (made with a local IPA and ground horseradish instead of jalapenos). Darren also made some buffalo wings for himself with a homemade spicy garlic wing sauce (hmmm….maybe after reading my post about the sketchy ingredients in wing sauce???)
Anyway, it was a fun and relaxing family day around here filled with lots of yummy food. I am such a sucker for salty snacks and good appetizers so I think the pretzel bites did me in!

As much fun as it is to indulge in a special meal every once in awhile, I know that I need to get back on track right away with a day of clean eating afterwards.
Today will be filled with lots of green juice for breakfast (this one has kale, romaine, celery, cucumber, an apple, a baby clementine, a squeeze of lemon and a teaspoon of spirulina)

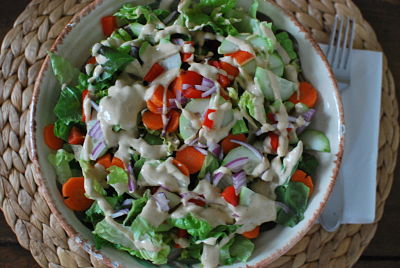
A huge salad for lunch (romaine with lots of veggies and tahini/lemon/cayenne dressing just like this one)
Fruits and Veggies for snacks

Add in a good workout, loads of water, and a Meatless Monday dinner and I will be right back on track. This recipe comes from Peas and Thank You, one of my favorite sources for kid-friendly vegan and vegetarian recipes.
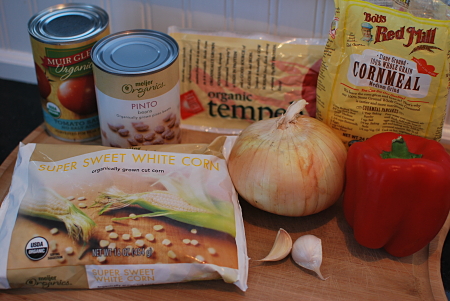
Starting line-up of antioxidant, protein, and fiber packed ingredients including veggies, beans, and tempeh. If you are not familiar with tempeh, it is a fermented soy product native to Indonesia. It has a nutty flavor and is versatile for vegetarian cooking. It is generally found in the refrigerated section of the produce department near the sprouts and tofu. This is a great recipe to try it out since it is crumbled up into the chili mixture.
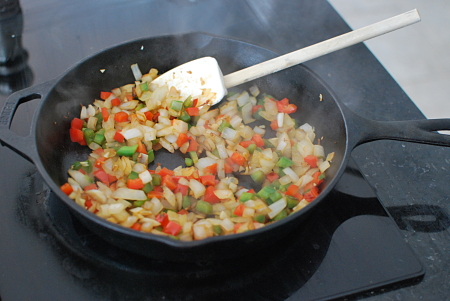
Chop pepper, onion and garlic and saute over medium heat until soft, about 4-5 minutes.
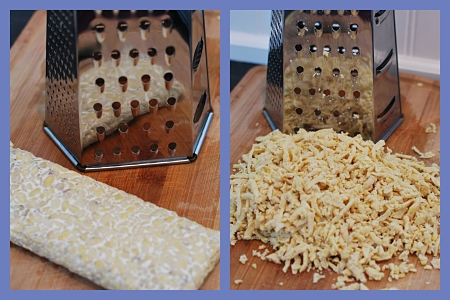
Meanwhile, grate tempeh with a cheese grater into uniformly-size crumbly pieces.
Add tempeh and 3 tablespoons of water and cook tempeh for another 5 minutes.
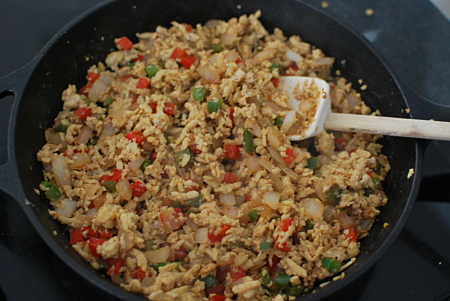
Add spices, tomato sauce and beans let this simmer for about 5 minutes to allow flavors to combine.
In a separate bowl, combine cornmeal, flour, baking powder, and salt. Mix liquid ingredients together in a glass measuring cup and add to dry. Stir until just combined and add in corn. Forget to take pictures……
Spray a 2-quart baking dish with olive oil and add veggie/bean/tempeh mixture. Top with cornbread mixture and bake at 400 degrees for about 20-25 minutes, or until golden brown on top.
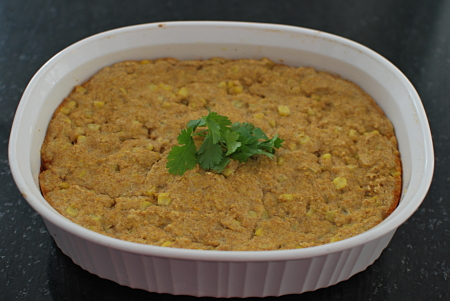
Top individual servings with sour cream, guacamole, and/or chopped cilantro.
Tempeh Tamale Pie
Adapted from Peas and Thank You
Ingredients for the filling:
1 medium onion or 1/2 of a large onion, chopped
1 cup red or green pepper (or combination of both), chopped
1 8 oz. package tempeh, crumbled
2 cloves garlic, minced
2 tsp. chili powder
1 tsp. ground cumin
1/2 tsp salt (I used a little more since my tomato sauce had No Salt Added)
1 tsp maple syrup
1 14 oz. can tomato sauce (organic and BPA-free if possible!)
1 15 oz. can pinto beans, drained and rinsed
Ingredients for the crust:
2/3 cup cornmeal
1/3 cup flour (regular, whole wheat pastry, or gluten-free alternative)
2 tsp. baking powder
1/4 tsp salt
1/2 cup non-dairy or organic milk
2 T. unsweetened applesauce (or substitute melted coconut oil, grassfed butter, or olive oil)
1 T. maple syrup
1 cup frozen corn (I prefer organic, non-GMO corn)
Optional Toppings:
1/2 cup grated cheese to add to top of cornbread before baking, sour cream, chopped cilantro, guacamole, olives, etc.
Directions:
- Preheat oven to 400 degrees.
- Place a large skillet over medium high heat and spray with olive oil or non-stick spray. Add onion, peppers, and garlic and sauté until softened, about 4-5 minutes.
- Grate or crumble tempeh and add to the pan with the sautéed vegetables. Add 3 T. water to help steam tempeh. Cook for an additional 4-5 minutes.
- To the pan, add chili powder, ground cumin, salt, maple syrup, tomato sauce and beans.
- Allow bean mixture to simmer for a few minutes to combine flavors. Transfer to a 2-quart baking dish that has been sprayed with cooking spray or lightly coated with oil and set aside.
- In a medium bowl, combine cornmeal, flour, baking powder and salt.
- In a glass measuring cup, combine milk, maple syrup and applesauce.
- Add wet ingredients to the cornmeal mixture and stir until just combined.
- Gently fold in the defrosted corn.
- Spread corn mixture carefully and evenly over the top of the casserole dish.
- If using, top the casserole with shredded cheese.
- Bake for 20-25 minutes, until crust is set and starting to brown.
- Serve with desired toppings.
This was the third time I’ve made this casserole and overall it was pretty good. The filling was tasty but could potentially have a little more flavor with the addition of some fire roasted tomatoes. I am definitely going to experiment with a variation on the cornbread topping next time to get more of a traditional cornbread top – this was just a bit flat and grainy for my tastes. I’m thinking of switching to unbleached all purpose flour and coconut oil or grassfed butter instead of the applesauce. But this was good for a cleaned up and dairy-free/meatless version of the classic tamale pie to end my day of back-on-track clean eating.
I am quite obsessed with kale. When I combine my finance background with my love for nutrition, the reasoning goes something like this – you simply cannot get more nutritional bang for your buck when it comes to kale!!!! For a mere $1.49, I can get a bunch of kale so big that I have to wrestle it into the bag. I must look like I’m losing the battle sometimes because I have had people in the grocery store ask me what it is that I am buying!

There are a lot of reasons why kale is considered one of the healthiest vegetables on the planet.
The Nutritional Details: One cup of kale contains 36 calories, 5 grams of fiber, and 15% of the daily requirement of calcium and vitamin B6 (pyridoxine), 40% of magnesium, 180% of vitamin A, 200% of vitamin C, and 1,020% of vitamin K. It is also a good source of minerals copper, potassium, iron, manganese, and phosphorus. (SOURCE)
What does all of that mean???
- Kale is a rich source of antioxidant vitamins A, C, and K, fiber and carotenoids. Research has shown that kale contains 45 different flavonoids with a variety of antioxidant and anti-inflammatory properties.
- It is a very potent source of vitamin K, which can reduce the overall risk of developing cancer, according to a study in the American Journal of Clinical Nutrition.
- Kale is one of the best sources of beta-carotene, one of the antioxidants believed by many nutrition experts to be a major player in the battle against cancer, heart disease, and certain age-related chronic diseases.
- Kale possesses other important carotenoids: lutein and zeaxathin. These help keep UV rays from damaging the eyes and causing cataracts.
- According to recent research results, kale is an incredible source of well-absorbed calcium, which is one of the many factors that may help prevent osteoporosis.
- The manganese in kale helps your body’s own antioxidant defense system, protecting you from damaging free radicals.
- Its folate and B6 team up to keep homocysteine levels down, which may help prevent heart disease, dementia, and osteoporosis bone fractures.
- Beyond antioxidants, the fiber content of cruciferous kale binds bile acids and helps lower blood cholesterol levels and reduce the risk of heart disease, especially when kale is cooked instead of raw.
Something else I found particularly interesting is that kale contains indole-3- carbinol, a nutrient that seems to play a role in how estrogen is metabolized in the body and may play a protective role against breast cancer. According to the naturopathic physician quoted in this article, “We sometimes use it as a supplement in patients with breast cancer, anyone who has a reason to be concerned about developing breast cancer and for those with estrogen-dominant illnesses like fibroids, fibrocystic breast disease or endometriosis, to try to help modulate negative estrogenic effects in the body. Eating kale is a natural way to do that.”
With all that being said, I learned a couple of years ago when my mom was experiencing some heart problems that the high amount of vitamin K can cause problems for some people. Anyone taking anticoagulants (blood thinners, such as Warfarin, Coumadin, etc) or other medications should avoid kale because the high level of vitamin K may interfere with the drugs. Please consult your doctor before adding or increasing the amount of kale and other greens to your diet.
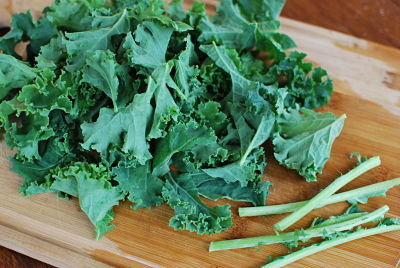
But for those who are looking to add more of this SUPERFOOD to their diet, I highly suggest starting with kale chips!!!
Start by removing the tough stem from the center of each stalk. This part can taste bitter. Tear the remaining leaves into bite-sized pieces.
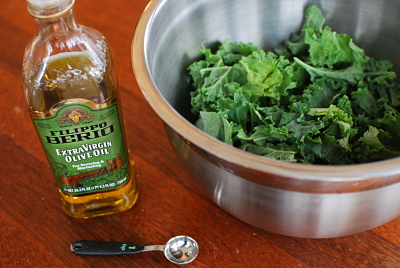
Wash and dry kale (I use a salad spinner)
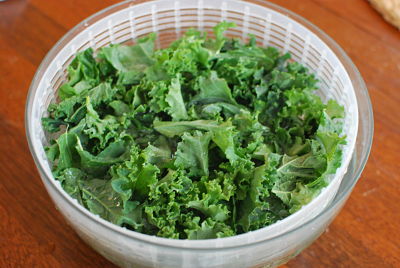
With clean hands, massage kale leaves with extra virgin olive oil to get them completely coated. For reference, I used about 2 teaspoons of oil for a whole head of kale.
Spread on a SINGLE layer on a baking sheet (or two sheets if necessary). Sprinkle with coarse ground kosher salt. For this batch, I used about 1/2 teaspoon.
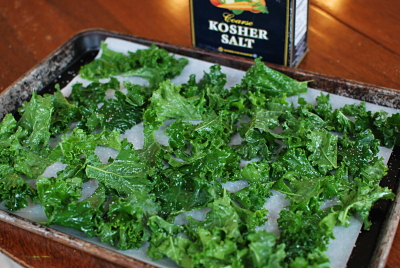
Bake at 375 degrees for 10 to 15 minutes. Start checking the kale chips around 12 minutes as you will want them to be super crispy, but not burnt. Mine are usually perfect around 14 minutes. I just taste as I go, which depletes about half the pan!
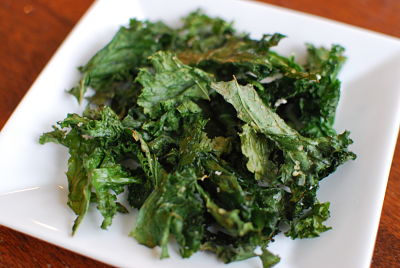
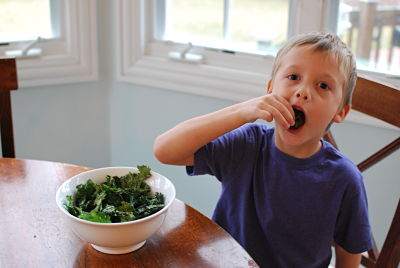
With the kids helping me, we can usually eat an entire batch in one sitting. And by sitting, I mean standing over the pan shoving them in our mouths!!!
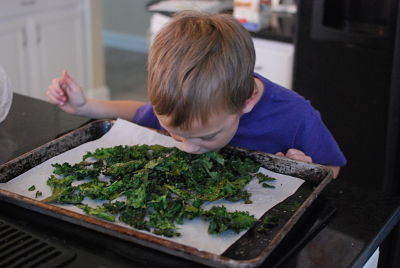
Look Mom—no hands!!!
There are a TON of variations all over the internet. But this classic version is quick, easy, and SO good! I hope you’ll give them a try!
I have decided that one of my goals this year is to focus a little more on better nutrition for my two kids. I probably love healthy eating more than the average person – I feel my best when my days are full of green juice, chia pudding, and kale salads and truly enjoy eating this way. But over the past year or so, I have found that while I’m experimenting with new recipes for myself to enjoy, I am falling back into old habits and feeding my kids more processed foods during the day than I would like. So, I’d like to work on swapping out some of their packaged snack foods for more nutritious, real foods.
I am a busy parent of two kids with time and budget constraints just like everyone else. I realize just how convenient it is to toss a granola or cereal bar in the backpack for a snack. But a recent review of the approximately 45 different ingredients in Kellogg’s Nutri Grain Bars (8 of them being different forms of sugar, many ingredients that I cannot pronounce, artificial flavors, and artificial food colorings) leaves me feeling like I can easily do better than this. With just a little effort, I can have make a homemade snack that is not full of an entire day’s worth of sugar, genetically modified foods, and unrecognizable ingredients and still gets the thumbs up from my family.
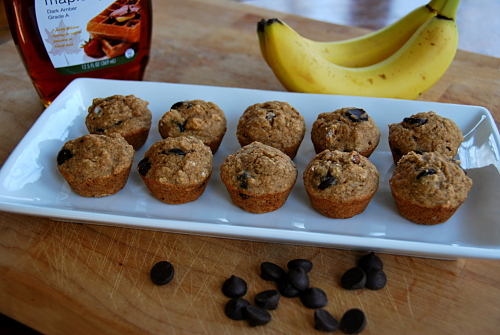
So, this week I baked up a batch of one of our favorite muffins to pack as a snack throughout the week. My kids love these mini banana chocolate chip muffins based off of the Oil-free Vegan Banana Bread by the vegan cookbook author Dreena Burton of Plant Powered Kitchen. I love that these muffins are full of REAL food ingredients – with no white flour, no white sugar, and no oil. With the addition of a few chocolate chips, my kids think they are getting a treat when in reality they are getting less sugar than a pre-packaged granola bar!
Mini Banana Chocolate Chip Muffins
Adapted from the recipe by Dreena Burton
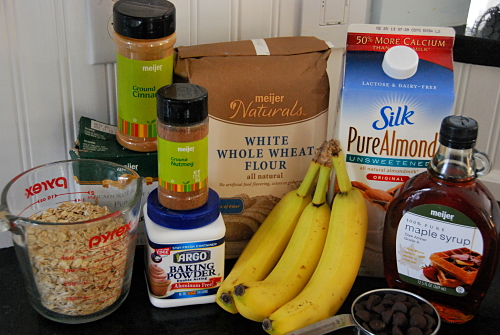
1 cup white whole-wheat flour or whole-wheat pastry flour
3/4 cup oat flour (oats finely ground in a blender or coffee grinder – grind first, then measure)
2 tsp baking powder
1/2 tsp baking soda
1/2 tsp cinnamon
1/4 tsp ground nutmeg
1/4 tsp salt
1 cup pureed overripe banana (puree bananas in deep cup with an immersion blender, or in a blender or mini food processor. Puree first, then measure)
1/2 cup pure maple syrup
1/2 cup plain unsweetened non-dairy milk (I like almond milk, but you can use soy or other)
1 tsp pure vanilla extract
1/2 cup chocolate chips
Preheat oven to 350. In a large bowl, mix dry ingredients. In a separate bowl, combine mashed banana, maple syrup, almond milk, and vanilla. Add wet mixture to dry, fold in chocolate chips, and stir until just combined (very important not to overmix). Lightly grease a mini muffin pan (I use a Misto sprayer filled with grapeseed oil) and fill 2/3 of the way full. Bake for approximately 15 minutes, just until a toothpick comes out clean. Makes approximately 2 1/2 dozen mini muffins.
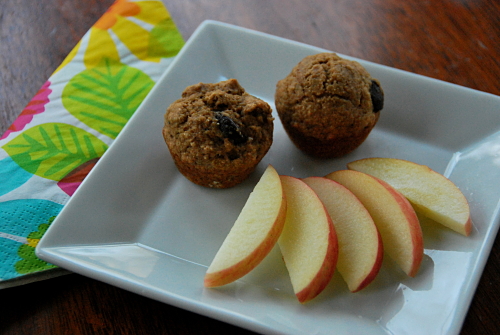
My kids will be enjoying a couple of these mini muffins with a few apple slices as their afternoon snack this week! I hope you enjoy them too.