Welcome!
 Hi, I'm Tori! Welcome to Healthy Plate Happy Family!
I am a fun-loving, healthy-eating, wife, mom, holistic
nutrition student, aspiring yogi, SUP-enthusiast, living
and loving life on the beautiful coast of West Michigan.
Here you'll find all of the whole foods, clean-eating recipes
that I am cooking up to keep my family happy and healthy!
Thanks for stopping by!
Hi, I'm Tori! Welcome to Healthy Plate Happy Family!
I am a fun-loving, healthy-eating, wife, mom, holistic
nutrition student, aspiring yogi, SUP-enthusiast, living
and loving life on the beautiful coast of West Michigan.
Here you'll find all of the whole foods, clean-eating recipes
that I am cooking up to keep my family happy and healthy!
Thanks for stopping by!


Earlier today, I was talking with a friend about finding the time to eat healthy. Working, going to school, taking care of kids, a new baby, travelling, sports, volunteering, moving, or just living life….whatever it is that keeps you busy, I think we can all relate. I am definitely trying to take this into consideration with the recipes that I feature here.
Ironic that we were talking about it today, because for me, Sunday afternoon is the ideal time to make up a couple of things to eat for the week. I usually try to make one thing for the kids (muffins, oatmeal bars, granola bars, quick bread, healthy cookies, or a soup or casserole to pack for lunches) and one thing for us (soup, grilled chicken breasts, boiled eggs, chicken salad, chickpea salad, or washed and chopped greens for smoothies and salads, etc). By taking an hour or so to do this, it ensures that we have a few healthy things stocked in the refrigerator all week long for those times when we need something quick.
And like every busy mom since the 70’s, I love finding great Crock-Pot meals for busy days. You just cannot beat the convenience of coming home to a nearly finished dinner! Tonight’s dinner was a new recipe and WOW, was it a hit!! Easy, healthy, and full of flavor.
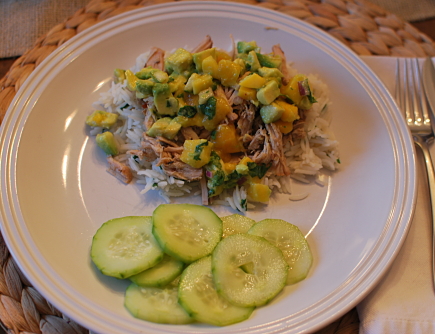
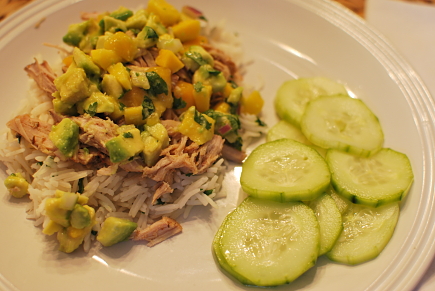
Slow Cooker Jamaican Jerk Pork with Caribbean Salsa
Recipe adapted from Skinny Taste
Jamaican Jerk Pork Ingredients
3 lb pork loin (all visible fat trimmed from the bottom)
3-4 cloves garlic, minced
2 T. jerk seasoning (I used the McCormick Perfect Pinch Jerk seasoning)
1/2 tsp kosher salt
1 lime, juiced
1/2 cup orange juice (store bought or a couple of fresh squeezed oranges)
Caribbean Salsa Ingredients
1 avocado, diced
2 mangos, finely diced (or 1 1/2 cups thawed from frozen)
1 1/2 T red onion, finely diced
2 T. fresh cilantro, chopped
2 T. fresh squeezed lime juice
kosher salt to taste (I used about 1/4 tsp)
Directions
Mix lime juice, orange juice, minced garlic, jerk seasoning, and salt.
The original recipe calls for the marinade to be poured over the pork and marinated in the refrigerator overnight (in a ziploc bag or large covered dish). While this would be a great option for a busy weekday, I missed this step and just added everything to the Crock-Pot before cooking it and it still tasted great.
Add pork and marinade to slow cooker and cook on low for 4-8 hours. Here is where you will need to know your slow cooker a little bit. Even on low, mine seems to cook pretty quickly. Our pork loin was perfect after 4-5 hours.
Remove pork to a cutting board and shred using 2 forks.
Remove liquid from the slow cooker and reserve. Add pork back into slow cooker along with 1 cup of the reserved liquid. Allow this to sit while you prepare the salsa.
To prepare salsa, add diced avocado, diced mango, chopped onion, cilantro, and fresh squeezed lime juice to a bowl. Gently toss to combine and season with kosher salt.
I served this over cilantro lime rice. I made up some basmati rice according to the directions on the package, and mixed it with some fresh lime juice (1-2 T), chopped cilantro (1-2 T), and a pinch of kosher salt.
For a side, I went with some simple marinated cucumbers and they were great together!
Marinated Cucumbers
Ingredients
2 cucumbers, peeled and sliced
1/2 cup white distilled vinegar
1/4 cup cold water
3 T sugar (could sub honey)
1/2 tsp kosher salt
Directions
Mix vinegar, water, sugar and salt. Add sliced cucumbers and toss to coat. Cover and refrigerate for 2-3 hours before serving.
I have been trying to branch out from standard store-bought hummus lately. It gets a bit pricey since we eat so much of it. But also, I just wanted to mix it up a little bit and try something different.
When I saw this dip on Pinterest, I just knew it would be a winner! Not exactly hummus, but more of a hummus guacamole blend. Quick, easy, kid friendly, versatile, and tastes great. What more can you ask for?!?
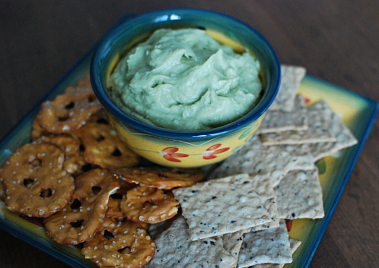
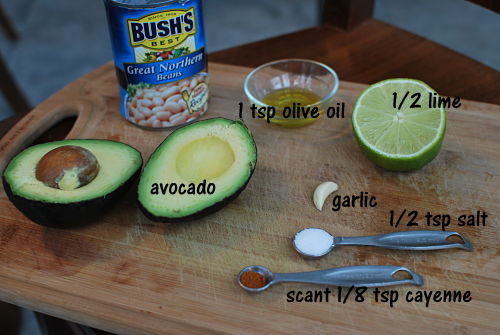
Avocado and White Bean Dip
First things first, I always wash my produce before I cut into it since this can transfer germs from the outside into the fruit or vegetable that you’re cutting!
Slice the avocado length-wise all the way around and twist to open. Using a large sharp knife, give it a good whack into the pit and twist to remove it (see this youtube tutorial if you’re not familiar with this method of pitting an avocado).
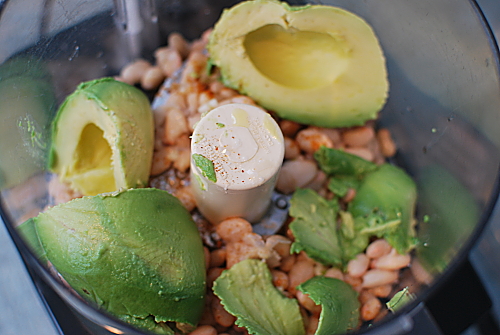
Scoop the avocado flesh out and place it into the bowl of a food processor fitted with the “S” blade. Squeeze the juice from the lime half into the bowl and add the remaining ingredients.
Place the lid on the food processor and process until smooth.
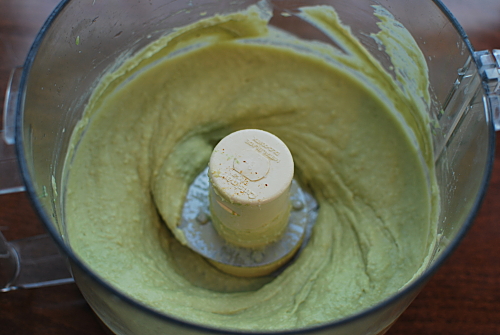
And in less than 10 minutes, you will have white bean and avocado dip packed with fiber (roughly 10 grams per serving!) and nearly 20 different vitamins, minerals, and phytonutrients. I especially like that you can store this dip in the refrigerator for a few days without it turning brown like traditional guacamole.
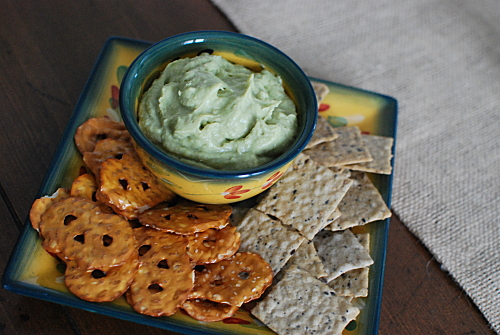
You can serve this with a combination of raw veggies and crackers (I prefer gluten-free rice crackers) or other chips (tortilla, pretzel chips, etc) for an appetizer or well-balanced snack.
Avocado and White Bean Dip
Ingredients
1 ripe avocado
1 can of Great Northern beans, drained and rinsed well
1 /2 lime
1 tsp extra virgin olive oil
1 clove garlic, minced
1/2 tsp kosher salt
1/8 tsp cayenne pepper (or to taste)
Directions
Add the flesh of one avocado, the juice of 1/2 of a lime, olive oil, minced garlic, kosher salt, and cayenne pepper to the bowl of a food processor fitted with the “S” blade. Process until smooth. Adjust seasonings to your liking (more lime, salt, or cayenne). Serve with veggies, chips, or crackers.
I am not going to lie….our Meatless Monday dinner was AWESOME tonight! I love when healthy meals turn out really, really GOOD! It is a Southwestern (and vegetarian) spin on classic stuffed peppers.
Some food for thought – bell peppers are the #3 most pesticide contaminated produce on the Environmental Working Group’s Shopping Guide to Pesticides in Produce, with up to 15 different pesticides found on a single pepper. If you are looking to reduce your exposure to the toxins in pesticides, you can refer to the list of the “Dirty Dozen” fruits and vegetables, and try to buy these fruits and vegetables organically grown, if possible.
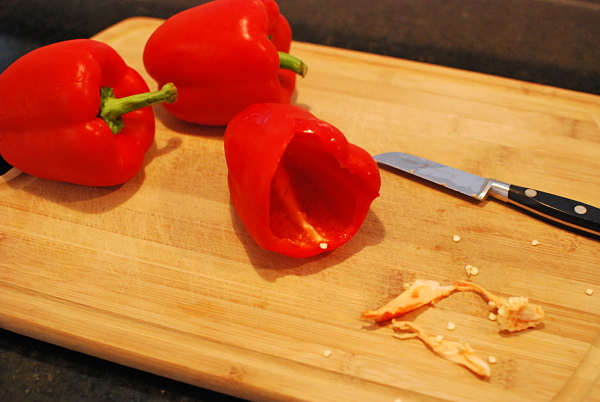
Start with some bell peppers (we prefer the red, yellow, or orange for this dish). Cut the stem out of the center and remove the seeds and membranes inside.
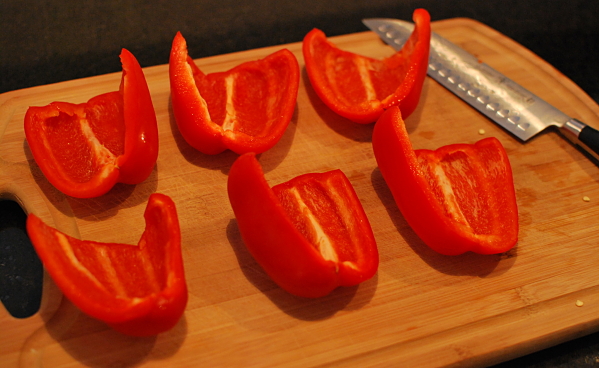
I prefer to serve pepper halves so I sliced each pepper in half from the top down.
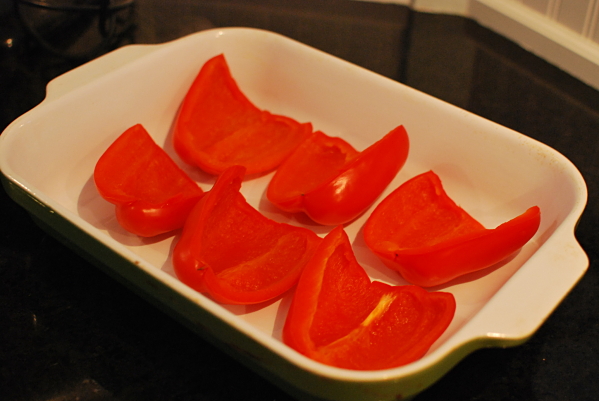
In a large stock pot, boil the peppers for 5 minutes. This will ensure that they are perfectly done, and not “crunchy” after baking. When peppers are done, remove from water with tongs and place into 9 X 12 casserole dish. Sprinkle with a pinch of kosher salt.
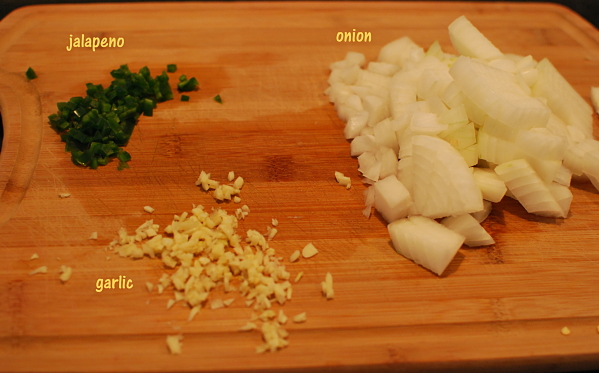
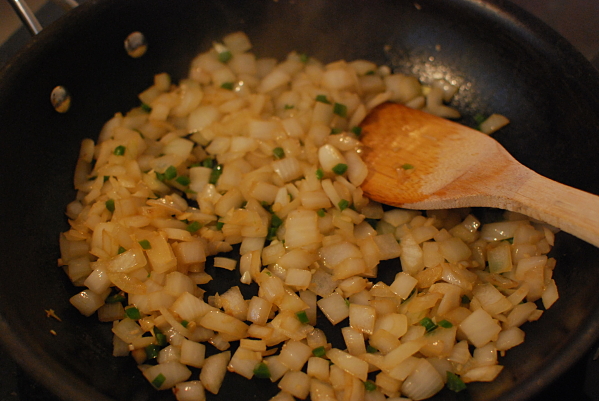
Chop 1 onion, 2 cloves of garlic, and a jalapeno.
In a large skillet, saute onion, garlic, and jalapeno in 2 tsp. of olive oil over medium heat for 5 minutes, until veggies are softened.
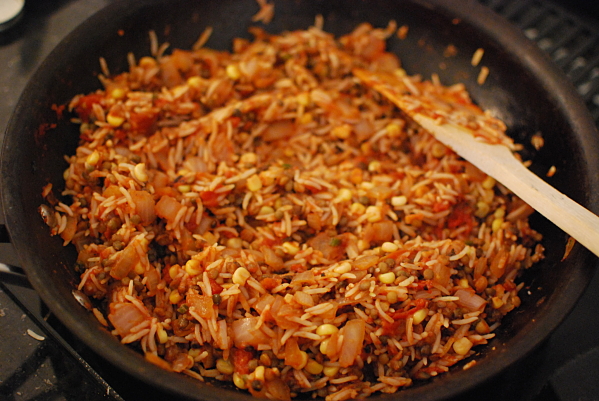
Add in 1 can of fire roasted tomatoes, 2 cups cooked rice, 1 cup of frozen corn, 1 1/2 cups of cooked lentils, 1 tsp. ground cumin, 1/8 tsp. of ground chipotle pepper, and 1/2 tsp. salt. Mix well and let simmer for 5 minutes.
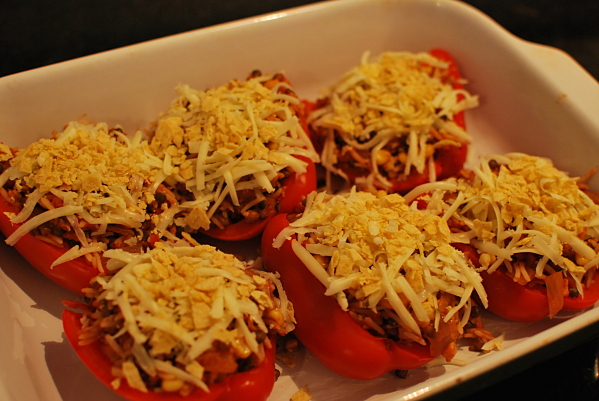
Scoop rice mixture into peppers. This amount of rice would fit nicely into 4 whole peppers (8 halves) but I knew 3 peppers would be plenty for us. Any leftover rice can be baked separately in a small dish.
Top each stuffed pepper with a couple of tablespoons of shredded jalapeno pepperjack cheese and crushed tortilla chips.
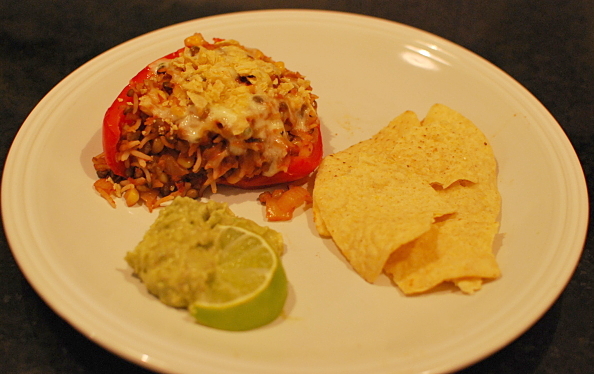
Bake uncovered for 25 minutes. Serve with guacamole and extra chips on the side.
Southwestern Stuffed Peppers
Ingredients
3-4 bell peppers (we prefer red, yellow, or orange)
1 cup rice (cooked according to directions on package, yielding appx. 2 cups)
1 medium onion, chopped
1 jalapeno pepper, seeds and ribs removed, finely diced (or substitute mild green chilies)
2 cloves garlic, minced
2 tsp. extra virgin olive oil
1 cup frozen corn
1 1/2 cups cooked lentils (I buy them pre-cooked at Trader Joes. I believe you can also buy them canned similar to beans)
1 can fire roasted tomatoes
1 tsp. ground cumin
1/2 tsp kosher salt
1/8 tsp chipotle chili powder
Topping Ingredients
1/2 cup shredded pepperjack cheese
crushed tortilla chips
“quick guacamole” (1 mashed avocado with a squeeze of lime and pinch of salt)
Directions
Preheat oven to 350 degrees.
Cook rice and lentils as necessary.
Bring large stockpot full of water to boil.
Remove stems, seeds, and membranes from peppers. Slice in half vertically if desired.
Boil peppers for 5 minutes. Remove with tongs and place into a 9 X 12 casserole dish. Sprinkle with kosher salt.
Heat 2 tsp. of olive oil in a large skillet over medium heat (being careful not to let it smoke). Saute chopped onion, jalapeno (or green chilies), and garlic for 5 minutes, until softened.
Add into skillet 1 can of fire roasted tomatoes, 2 cups cooked rice, 1 cup frozen corn, 1 1/2 cups cooked lentils, 1 tsp. ground cumin, 1/2 tsp. kosher salt, and 1/8 tsp. chipotle chili powder. Mix well and let simmer for 5 minutes.
Stuff pepper halves with rice mixture. Top with 2 T. shredded pepperjack cheese and some crushed tortilla chips.
Bake uncovered for 25 minutes.
Serve with simple guacamole and additional chips, if desired.
I had every intention of actually getting this post up on Monday, the one day during the week that I commit to making a vegetarian dinner for our family. But an interesting opportunity came up that changed up my plans at the last minute. I found out that a local chiropractor was showing the documentary “Doctored” so of course I needed to take advantage of the opportunity to socialize with some of my fellow health nuts!!

Overall, I liked the movie and found some of the facts presented to be very eye-opening. For example, did you know that “although the U.S. makes up only 5% of the world’s population, we consume over 50% of all the world’s pharmaceutical drugs?” I think that is shocking!
The movie is centered on the chiropractic profession and their struggle against “big business” and the American Medical Association. Although I felt like the movie lost focus near the end, they still managed to make the point that there are very effective alternative treatments available for many of the pains and illnesses that plague us. Whether your medications and current approach aren’t working, or you would like to explore an alternative to prescription drugs and surgery, it is important to educate yourself of other options besides our traditional Western medicine. Our family, personally, has had amazing success with chiropractic care. I won’t go into too much detail here, but years ago, we successfully treated our daughter’s asthma diagnosis through chiropractic adjustments. I am a firm believer in the healing energy within our own bodies.
It was incredible to see the examples of cases they presented where debilitating chronic pain was resolved through something as simple as chiropractic adjustments as well as proper diet and nutrition.
Proper nutrition….my favorite subject.
So lets get going with this healthy vegetarian-friendly soup! Its Butternut Squash Apple Curry soup based off of this recipe from one of my favorite classical chefs, Ina Garten, better known as the Barefoot Contessa.
I first made this recipe because I wanted to experiment with curry powder in a recipe after learning some of its health benefits. Curry powder is a mixture of spices including turmeric and curcumin. Turmeric has been found to reduce inflammation of the joints. Some studies suggest that turmeric may also help protect us against cancer, heart disease and even Alzheimer’s disease. Studies done at one of the world’s most renowned cancer centers, MD Anderson Center in Texas, have shown that curcumin seems to turn off genes that can trigger the onset and spread of breast cancer. It also shows some promise, in a handful of patients, in stabilizing pancreatic cancer. Who knew all of that power was there in a little spoonful of spices???
I like to start this recipe ahead of time by roasting a butternut squash the night before I plan to make the soup (usually while our dinner is cooking or afterwards, while the oven is still hot). Slice the squash in half and remove the seeds. Brush a little olive oil on the cut surfaces and place it cut-side down on a baking sheet. Roast at 350 degrees for an hour (up to an hour and a half depending on size), until the squash is golden and soft. Once it has cooled, scoop the flesh of the squash from the skin and store it in the refrigerator until you are ready to proceed with the soup. The soup comes together quickly after the squash has been roasted!
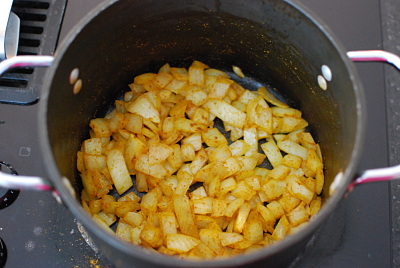
Next, saute a chopped onion and 2 tsp. of curry powder in olive oil, grass-fed butter, or ghee. If it starts to dry out, add a little bit of vegetable stock – this is a great way to cut back on the amount of butter and oil used.
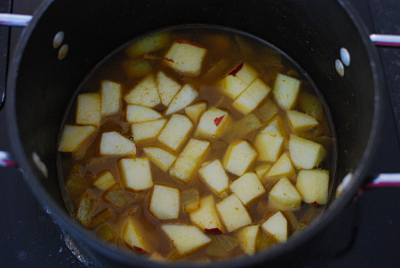
After about 10 minutes, add in 2-3 peeled, cored, and chopped apples and 2 cups of vegetable stock. Let this simmer for about 8 minutes until the apples are soft.
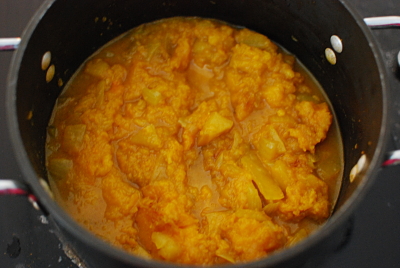
Add in the roasted and peeled butternut squash, 1/2 tsp. kosher salt and 2 cups apple cider. To get the right taste, be sure to use cider and not apple juice.

Mix to incorporate everything and let this cook for a few minutes until the squash is heated.
Puree with an immersion blender and adjust seasonings to taste.
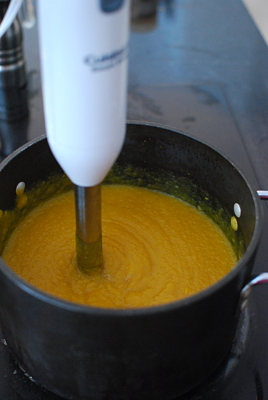
If you want it spicier, add more curry. If it doesn’t taste sweet enough to you, add a bit more apple cider. The flavor of the soup can vary quite a bit based on the size and flavor of the apples and squash. Also, you can adjust the thickness of the soup to your liking by adding more broth, cider, or even water. When I reheat this soup for lunch later in the week, I always need to thin it out more with about half a cup of liquid.

Paired with some good bread and a salad of mixed greens, pears or apples, red onion and toasted nuts, it makes a great vegetarian lunch or dinner and is a great use of seasonal produce.
Butternut Squash Curry Soup
Recipe adapted from here
Ingredients
1 large butternut squash (roasted ahead of time, cut-side down on a baking sheet at 350 degrees for about an hour)
1 sweet onion, chopped
2 tsp. olive oil, butter, or ghee
2 tsp. – 1 T. of curry powder, depending on how spicy you want it
2-3 apples, peeled, cored, and chopped
2 cups vegetable stock (optional, can just use water)
1/2 tsp. sea salt or to taste (adjust as necessary)
fresh ground black pepper
2 cups good quality apple cider
Directions
Roast butternut squash ahead of time. Cool and scrape squash from peel. This can be done 1-2 days in advance and kept in the refrigerator.
Heat a dutch oven or stock pot over medium heat. Add olive oil and/or butter to pan. Saute chopped onion and curry powder for about 10 minutes, until onions are soft and translucent. If onions begin to stick, add a splash of vegetable stock or water to the pan.
After 10 minutes, add peeled, chopped apples, cooked butternut squash and 2 cups of water or vegetable stock and simmer covered over low heat for another 10 minutes.
Remove from heat. Add 1 cup of apple cider, 1/2 tsp. salt and some fresh ground pepper and puree with an immersion blender. Alternatively, you can puree the soup in a blender in batches. Add up to an additional cup of apple cider. Taste and adjust seasonings as desired. This soup tastes better after it sits and flavors have developed.
Did anyone else have lots of yummy party food for the Superbowl yesterday???
This football-obsessed household loves having an excuse to make some of our favorite tailgating recipes and party appetizers! In honor of the game being held in New Orleans, of course we had to make Gumbo (using organic chicken andouille sausage and amped up with lots of spicy creole seasoning), along with Caesar salad (dressing made with Vegenaise soy-free mayo and minus the anchovy paste), and soft pretzel bites with beer cheese dip (made with a local IPA and ground horseradish instead of jalapenos). Darren also made some buffalo wings for himself with a homemade spicy garlic wing sauce (hmmm….maybe after reading my post about the sketchy ingredients in wing sauce???)
Anyway, it was a fun and relaxing family day around here filled with lots of yummy food. I am such a sucker for salty snacks and good appetizers so I think the pretzel bites did me in!

As much fun as it is to indulge in a special meal every once in awhile, I know that I need to get back on track right away with a day of clean eating afterwards.
Today will be filled with lots of green juice for breakfast (this one has kale, romaine, celery, cucumber, an apple, a baby clementine, a squeeze of lemon and a teaspoon of spirulina)

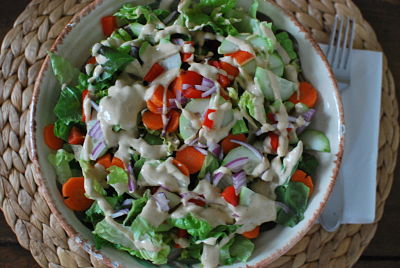
A huge salad for lunch (romaine with lots of veggies and tahini/lemon/cayenne dressing just like this one)
Fruits and Veggies for snacks

Add in a good workout, loads of water, and a Meatless Monday dinner and I will be right back on track. This recipe comes from Peas and Thank You, one of my favorite sources for kid-friendly vegan and vegetarian recipes.
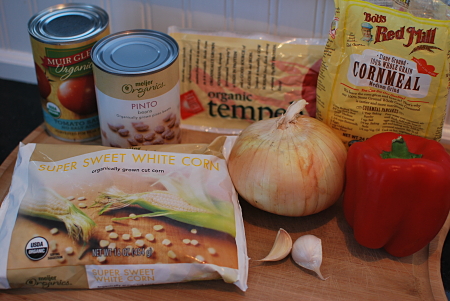
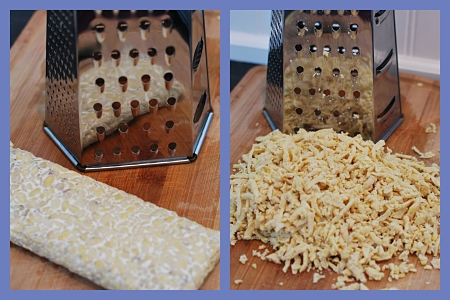
Starting line-up of antioxidant, protein, and fiber packed ingredients including veggies, beans, and tempeh. If you are not familiar with tempeh, it is a fermented soy product native to Indonesia. It has a nutty flavor and is versatile for vegetarian cooking. It is generally found in the refrigerated section of the produce department near the sprouts and tofu. This is a great recipe to try it out since it is crumbled up into the chili mixture.
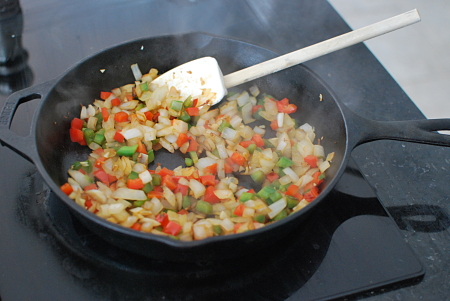
Chop pepper, onion and garlic and saute over medium heat until soft, about 4-5 minutes.
Meanwhile, grate tempeh with a cheese grater into uniformly-size crumbly pieces.
Add tempeh and 3 tablespoons of water and cook tempeh for another 5 minutes.
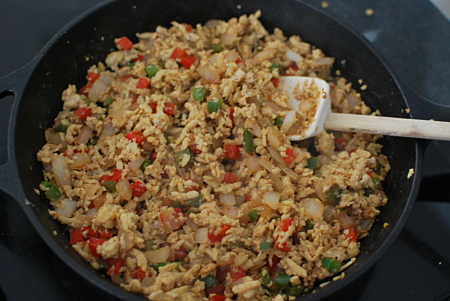
Add spices, tomato sauce and beans let this simmer for about 5 minutes to allow flavors to combine.
In a separate bowl, combine cornmeal, flour, baking powder, and salt. Mix liquid ingredients together in a glass measuring cup and add to dry. Stir until just combined and add in corn. Forget to take pictures……
Spray a 2-quart baking dish with olive oil and add veggie/bean/tempeh mixture. Top with cornbread mixture and bake at 400 degrees for about 20-25 minutes, or until golden brown on top.
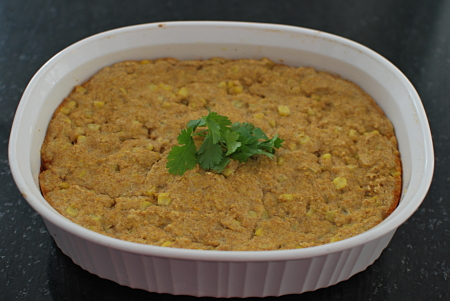
Top individual servings with sour cream, guacamole, and/or chopped cilantro.
Tempeh Tamale Pie
Adapted from Peas and Thank You
Ingredients for the filling:
1 medium onion or 1/2 of a large onion, chopped
1 cup red or green pepper (or combination of both), chopped
1 8 oz. package tempeh, crumbled
2 cloves garlic, minced
2 tsp. chili powder
1 tsp. ground cumin
1/2 tsp salt (I used a little more since my tomato sauce had No Salt Added)
1 tsp maple syrup
1 14 oz. can tomato sauce (organic and BPA-free if possible!)
1 15 oz. can pinto beans, drained and rinsed
Ingredients for the crust:
2/3 cup cornmeal
1/3 cup flour (regular, whole wheat pastry, or gluten-free alternative)
2 tsp. baking powder
1/4 tsp salt
1/2 cup non-dairy or organic milk
2 T. unsweetened applesauce (or substitute melted coconut oil, grassfed butter, or olive oil)
1 T. maple syrup
1 cup frozen corn (I prefer organic, non-GMO corn)
Optional Toppings:
1/2 cup grated cheese to add to top of cornbread before baking, sour cream, chopped cilantro, guacamole, olives, etc.
Directions:
- Preheat oven to 400 degrees.
- Place a large skillet over medium high heat and spray with olive oil or non-stick spray. Add onion, peppers, and garlic and sauté until softened, about 4-5 minutes.
- Grate or crumble tempeh and add to the pan with the sautéed vegetables. Add 3 T. water to help steam tempeh. Cook for an additional 4-5 minutes.
- To the pan, add chili powder, ground cumin, salt, maple syrup, tomato sauce and beans.
- Allow bean mixture to simmer for a few minutes to combine flavors. Transfer to a 2-quart baking dish that has been sprayed with cooking spray or lightly coated with oil and set aside.
- In a medium bowl, combine cornmeal, flour, baking powder and salt.
- In a glass measuring cup, combine milk, maple syrup and applesauce.
- Add wet ingredients to the cornmeal mixture and stir until just combined.
- Gently fold in the defrosted corn.
- Spread corn mixture carefully and evenly over the top of the casserole dish.
- If using, top the casserole with shredded cheese.
- Bake for 20-25 minutes, until crust is set and starting to brown.
- Serve with desired toppings.
This was the third time I’ve made this casserole and overall it was pretty good. The filling was tasty but could potentially have a little more flavor with the addition of some fire roasted tomatoes. I am definitely going to experiment with a variation on the cornbread topping next time to get more of a traditional cornbread top – this was just a bit flat and grainy for my tastes. I’m thinking of switching to unbleached all purpose flour and coconut oil or grassfed butter instead of the applesauce. But this was good for a cleaned up and dairy-free/meatless version of the classic tamale pie to end my day of back-on-track clean eating.
Without a doubt, carrot cake is my all time favorite dessert. Next up might be key lime pie. Oddly enough, chocolate desserts usually aren’t on my radar.
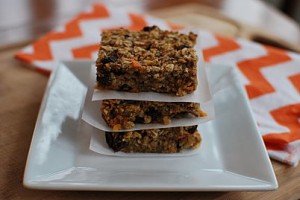
I’ve tried numerous recipes to make a lighter, healthier carrot cake but just haven’t quite nailed it yet. In the meantime, I still love the flavor combination, so when I saw this snack bar recipe over at Happy Healthy Mama, I knew I could tweak it just a bit to make it more like carrot cake.
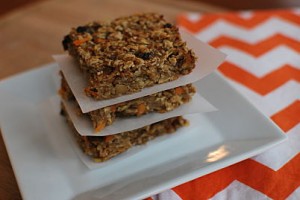
Needless to say these have been a huge hit around here!! There is so much nutrition packed into these little squares!!! Fruits, vegetables, oats, healthy fats, and Omega 3 fatty acids all sweetened naturally for an awesome on-the-go snack or breakfast!!
The original recipe called for eggs as the binder. Feel free to make them this way if you prefer or if it is what you have on hand. I decided to experiment with swapping out the eggs for a chia “egg” which is a common substitute in vegan baking. Since the kids have been eating eggs a lot for breakfast, I felt like this was a good place to reduce the egg and swap in something with a little more nutritional oomph. Chia seeds are an excellent source of plant-based calcium, protein and Omega 3 fatty acids. Since I haven’t made the original, I can’t compare the texture between the two, but we’ve been happy with them this way.
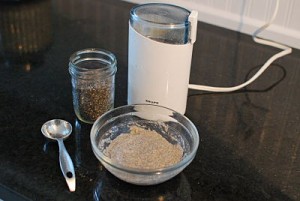
I have made chia gel or chia “eggs” two different ways now. The ratio is 1 tablespoon of chia seeds to 3 tablespoons of water – this will yield the equivalent of 1 egg. You can simply mix the whole chia seeds into a bowl of water or grind the seeds in a coffee grinder first and then mix with the water.
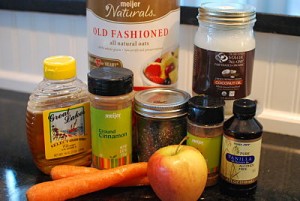
So lets make some oatmeal squares!!! Gather all of your ingredients – I love this recipe because I almost always have these ingredients on hand!
To make a chia egg, add 2 T. of ground chia seeds to a small bowl with 6 T. water. Mix with a fork and set aside while you prepare the rest of the ingredients.
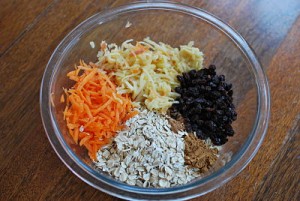
Into a large bowl, add oats, shredded carrots, shredded apple, raisins, and spices.
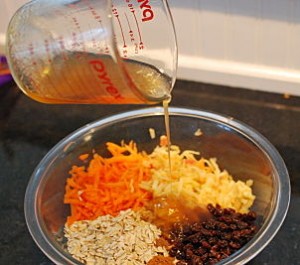
Combine wet ingredients: melted coconut oil, honey, and vanilla. Add to bowl along with gelled chia “egg”.
Mix wet and dry ingredients and press into a greased 8 X 8 pan (I greased mine with a little coconut oil).
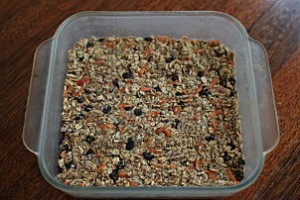
Bake at 350 degrees for 30 minutes. Cool in pan before cutting into squares. I have also found that I prefer to take these out of the pan to sit on a cooling rack for awhile. This seems to help the bottom “dry out” a little. I store them in a storage container in the fridge. They don’t last long around here 
Carrot Cake Oatmeal Squares
Inspired by Happy Healthy Mama
2 T. chia seeds, ground in coffee grinder (or sub 2 regular eggs)
2 Cups Old-Fashioned Oats
2 small-medium sized carrots, grated (or 1 large carrot)
1 apple, grated
Scant 1/2 cup raisins
1 tsp. ground cinnamon
1/2 tsp. nutmeg
1/4 tsp. ground allspice
1/4 tsp. ground ginger
1/3 Cup honey
1/3 Cup coconut oil, melted
1 tsp. pure vanilla extract
Extra coconut oil for pan
Directions
Preheat oven to 350 degrees and grease an 8 X 8 pan with coconut oil. Grind 2 T. chia seeds in a clean coffee grinder. Mix with 6 T. water in a small bowl and set aside to “gel”.
In a large bowl, combine oats, shredded carrots, shredded apples, raisins, and spices.
In a small bowl or glass measuring cup, combine melted coconut oil, honey and vanilla extract.
Pour liquid ingredients and thickened chia “gel” into oat mixture and mix well. Press down into an 8 X 8 pan and bake for 30 minutes. Let cool in pan before slicing into squares. Remove from pan to finish cooling on a rack.
Happy Wednesday!
We’ve been snowed in the last couple of days. Luckily I stocked up at the grocery store before the snow and sub-zero temps hit. We’ve only been in West Michigan for a year and a half and we’re still getting used to this lake effect snow that seems to go on and on and on! The kids think that it looks like we live inside of a snow globe!!!


Other than helping to get snow gear on and off, making endless cups of hot cocoa, and playing lots of board games, here is what I’ve been eating on this cold and snowy Wednesday. The morning started off with my version of a Chai Latte. Its made by steeping a Tazo Chai tea bag in half water and half almond milk and sweetened with some honey. I’ve been trying to cut back on coffee (more because of the chemical-filled, sugary sweetener I put in it than for the caffeine). This stuff is awesome and makes skipping the coffee pretty easy.

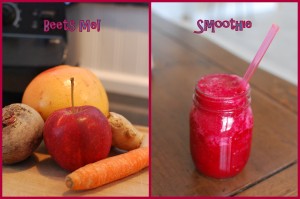
I’m still trying to eat super clean to combat all of these viruses going around right now. Breakfast was a giant glass of one of my favorite juice/smoothie combinations, which just happens to be loaded with Vitamin C. Its made with 1 red beet (raw, peeled, chopped), 1/2 red grapefruit, 1 carrot, 1 apple, and 1 small slice of fresh ginger. This is blended up with a cup or so of water in a high speed blender for about 30-45 seconds. I think if you wanted to try this in a regular blender, you would probably need to steam the beet first to get it a little softer. This is a great combination to put through the juicer too!
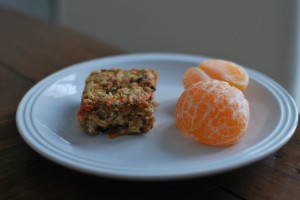
We were all a little bit snacky by mid-morning. It was just easier for us all to have the same thing with everyone home today. I made these carrot cake oatmeal bars the other day and they have been a huge hit around here. We paired them up with a clementine.
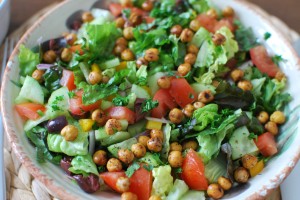
For lunch, I had a Greek-inspired salad. It was a huge bowl of red romaine topped with cucumbers, red onion, tomato, yellow pepper, kalamata olives and topped with a simple lemon and olive oil dressing and some fresh parsley. I don’t always take the time to chop up fresh herbs for my salad but I had them left over from the veggie burgers on Monday. I usually like to add toasted nuts to my salads for the crunchy texture and extra protein. I experimented with something new to top this salad – roasted chickpeas! They were sprayed with a little olive oil and some kosher salt, pepper, garlic powder, dried dill, and dried oregano. Roast them in a 425 degree oven, tossing half-way, for 30 minutes. This is nothing new in the healthy-eating-blog-world, but I had made them before and did not care for them. Turns out I didn’t cook them long enough to get crunchy and I also learned that they don’t keep very well, which is the mistake I made the last time by trying to make them ahead of time.
I also had some homemade Tomato Soup to go along with it. Now that is a lot of veggies to pack into one meal!!!!

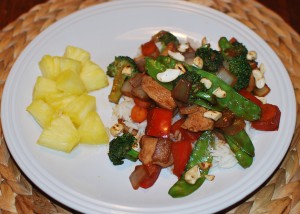
I know it was an awesome lunch when I can make it all the way to dinner without a snack! Highly unusual for me!! Dinner was chicken stir-fry served over Basmati rice with some pineapple on the side. It is very loosely based off of this recipe from Danica’s Daily. I basically use her recipe for the sauce (3T. Hoisin, 2T. vegetable stock, 1T. sherry, 1T. ketchup, 2 T. soy sauce, 1 tsp. fresh grated ginger, 1 tsp. sriracha hot sauce, and 1 T. brown sugar) but do not make it in the crock pot. I stir fry the chicken and set aside, then the vegetables until just tender. I add the sauce at the end and top it all of with some lightly toasted cashews. Out of all of the stir fry recipes I’ve tried over the years, this seems to be our favorite so far. Other than chopping up the vegetables (which could be done ahead of time) this dinner comes together really quick!
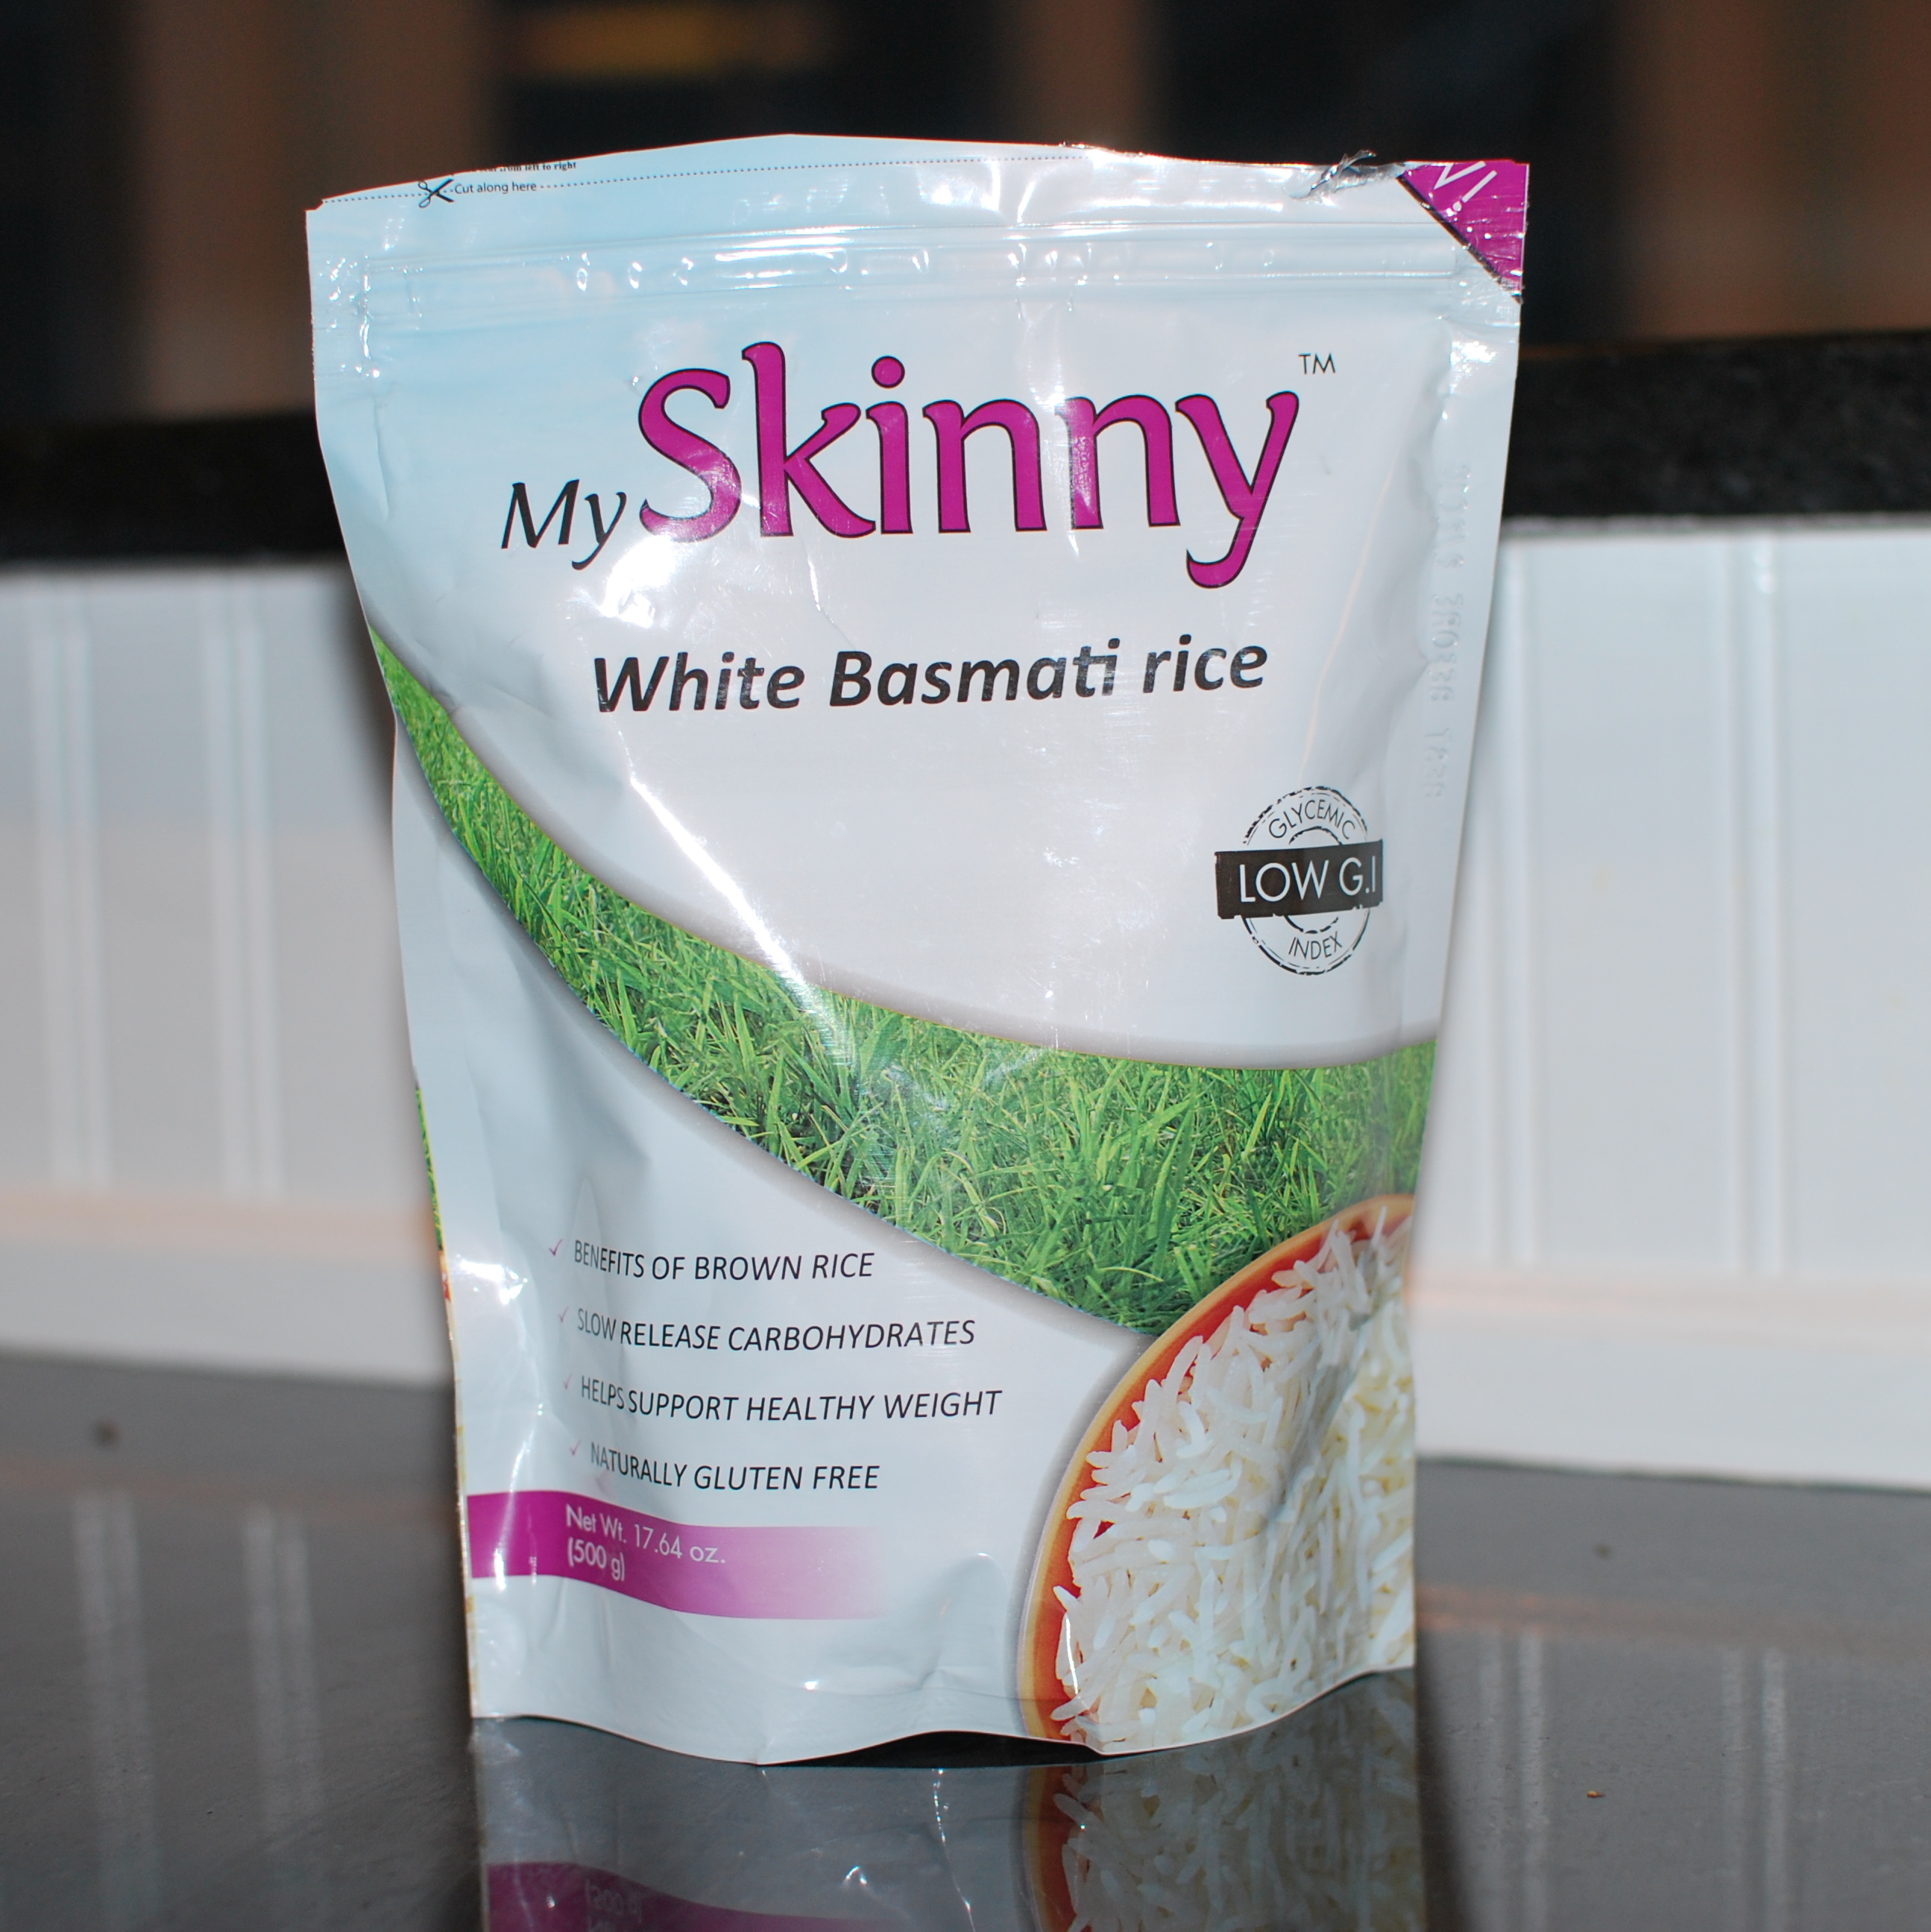
We’ve switched over to a new kind of rice lately. I have always used quick cooking brown rice, but I didn’t always get the texture right and sometimes it turned out a little bit sticky. Hailey had gotten to the point where she would only eat it if I made it into “fried rice” which involves a lot of extra soy sauce (sodium!) and oil. I recently found this at Meijer and love it. It retains 80% of the nutrients from the husk that traditional brown rice would. It is a slow-release carbohydrate with a low G.I. (glycemic index) of 52. This means the sugar is slowly released into your bloodstream, providing a steady supply of energy and helps you feel fuller, longer. I love the taste and texture and so far its cooked up perfect every time. If you see it in your grocery store, check it out!

Well that wraps it up for this Wednesday!!
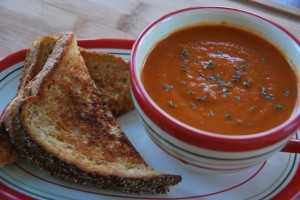
Tomato soup and grilled cheese. No doubt, one of the most simple comforting meals around, especially this time of year.
I love this as a quick weeknight dinner or to make ahead for lunches throughout the week. And it was through trial and error that I realized how much my kids love this soup. I had made a basic tomato vegetable soup for dinner one night. The kids were just picking at it when Hailey informed me that she would like it better if it was “smooth” tomato soup. So, a quick zip with the immersion blender and I had a new family favorite on our hands. I had made basic tomato soup before, but now I realized I could hide a few extra veggies in there and still pass it off as tomato soup! Genius!! Oh wait, Jessica Seinfeld already did that Oh well……
The ingredients are fairly simple and the extra veggies can vary by what you have on hand or what is in season. My biggest issue that I struggle with is the canned tomatoes. By now, I’m sure most everyone has heard news stories of BPA (or bisphenol A). It is a chemical that is used to harden plastic. It is found in everything from plastic water bottles and storage containers to cash register receipts and medical devices. Unfortunately, it is also present in canned goods. And it is actually more dangerous in canned tomatoes over other canned goods as the high acidity in tomatoes requires an even higher amount of the chemical in the cans, and therefore even more BPA is leached into the food.

BPA had been considered safe by the U.S. Food and Drug Administration until 2010 when the agency altered its position and expressed “some concern” about the potential effects on the brain, behavior, and prostate glands in fetuses, infants, and young children. Studies have linked BPA exposure to hormonal disruptions, brain and behavior problems, cancer, heart problems, and other diseases. And unfortunately, the effects are most pronounced in infants and young children as their developing bodies are less efficient at eliminating the substance.
The good news is that consumer awareness and demand are convincing manufacturers to begin phasing it out of many plastic products. Some states have banned the sale of certain products such as bottles and sippy cups made with BPA. It is possible to reduce exposure to BPA by using BPA-free products, using non-plastic containers for food, and using less canned foods when possible.
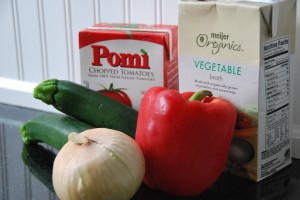
Which leads me to the tomatoes. The most readily available option that I have found that does not contain BPA is Pomi Chopped Tomatoes, which come in a tetra pak (box). Of course, these are a bit more expensive than traditional canned tomatoes. I try to stock up on them when they go on sale and definitely freeze any portion that I do not use. When debating whether or not to go with a more natural/organic/expensive product, I usually weigh in the amount of the item we consume, and particularly how much my children consume. Given that we use canned tomatoes so often in soups, casseroles, etc, I try to opt for the Pomi boxed tomatoes the majority of the time or as often as my grocery budget allows. Other options would be using your own canned tomatoes (something I’d eventually like to try!) or simply boiling whole roma tomatoes for a minute or two, and peeling them once cooled.
Lets make some soup!
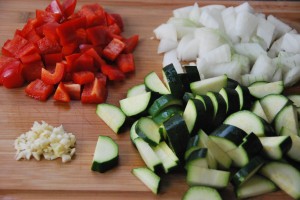
Chop all veggies into uniform pieces.
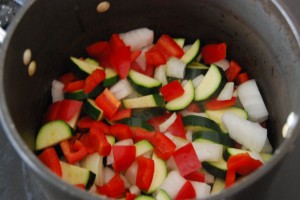
Heat a large pot (preferrably NOT a non-stick) over medium heat. Add the olive oil and veggies and saute approximately 5-7 minutes until soft.
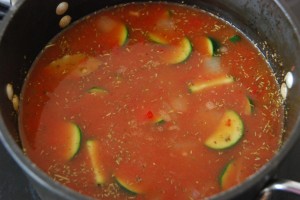
Add in tomatoes, broth and seasonings. Bring to a low boil and reduce heat. Simmer for 15 minutes.
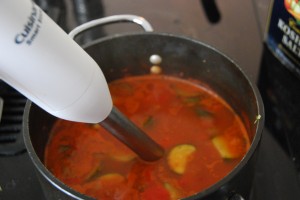
Remove the bay leaf. Blend with an immersion blender (or in batches in a traditional blender) until smooth.
The most recent time I made this soup, we happen to have a small amount of organic creamer left from the holidays (not something I normally have on hand). While I think this soup is really good without it, just a small amount makes it great (a bit more like a tomato bisque but much healthier)!

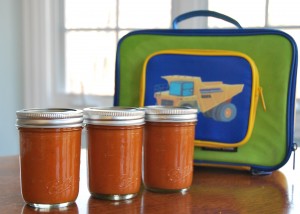
And since one of my New Year’s resolutions is to focus on improving the foods that my kids are eating, I’ve made a double batch of this soup to freeze in small glass jars. I can defrost it in the refrigerator overnight, and then heat it up in the morning and pack it in a Thermos in the lunchbox. Along with some whole grain crackers and string cheese or a whole wheat quesadilla and some fruit, this has become one of my kids favorite cold-weather school lunches!
Tomato Soup with a Twist
1 26 oz. box Pomi chopped tomatoes
1 32 oz. box organic vegetable broth (or other non-msg containing broth)
1 T. oil (extra virgin olive oil or grapeseed oil)
1 medium onion
2 small zucchini
1 bell pepper (red, yellow, or orange)
2 cloves garlic, minced
1 bay leaf
1/2 tsp. Italian seasoning blend
1/2 tsp. dried rosemary
1/2 tsp. kosher salt
1/4 cup organic dairy creamer (half and half)
Directions
Chop all vegetables into medium-size pieces. Heat oil over medium heat. Saute vegetables over medium heat 5-7 minutes, adding in garlic during last few minutes so that it does not burn. Add broth, chopped tomatoes, and seasonings and simmer for 15 minutes. Remove bay leaf and blend with an immersion blender or in a traditional blender in 2 batches. Taste for additional salt and pepper if desired. Blend in optional creamer if using.